Monday, October 31, 2011

Happy Halloween!

I have always loved Halloween. That definitely stems from my childhood, where Halloween was always a big deal in our house. We had Halloween parties, shopped for costumes every year and had a well decorated Halloween display to greet trick-or-treaters.

We have not been to a Halloween costume party in three years, but the last time we attended one we went the homemade, last minute route with Project Runway hosts Tim Gunn and Heidi Klum. Haha!


This year I did not get my act together to celebrate the way I am accustomed to, but we did manage to get one pumpkin carved last night...just in time! And of course I will be wearing an orange sweater to work today. (I can't help it.)

The only member of the family to receive a new costume this year was our goldendoodle Millie, who was more than happy to pose in her bumble bee costume over the weekend...


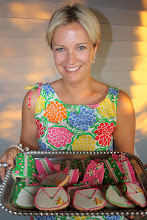
And of course this year there were cookies!


(Thank you Sue, Mary Jo, Jules and Mary!)

HAPPY Halloween to all, no matter what you may be doing. I hope you have a safe, fun night. Trick or treat?!

Thursday, October 27, 2011

Trick or Treat!

Want to know a little something about me? I don't really LOVE candy. Don't get me wrong...I have been known to have an Almond Joy or a handful of Sour Patch Kids from time to time, but overall my desire for candy is certainly not frequent. That goes for holiday candy in particular. I am not one of those people who rushes out in the early fall to stock up on candy corn for a snack (I think that dates back to an overdose in college.) I do however think it makes for excellent decoration, so you better believe I have a couple of bags in the cabinet to place in a vase or in a dish on our coffee table. I discovered this week that candy corn also makes for cute sugar cookies.

So if the actual candy isn't your thing, then you can have a look-alike cookie like I will...


HAPPY Halloween!

Tuesday, October 25, 2011

Lingerie Shower Cookies

I have weddings on the brain this week. Next weekend we are celebrating the wedding of our very good friends (the groom happens to be both my husband's cousin and best friend.) And the bride? Well, I've already shared my feelings about her on this blog. Needless to say we are excited. I am working on their favors in the next week and thankfully have had plenty of practice in the wedding cookie department lately.

Recently a friend of a friend contacted me about making cookies for a lingerie shower she was hosting. We decided on a mix of wedding, engagement and of course lingerie cookies. The cocktail that evening was to be champagne with strawberries, so we included that too. In the end I think the mix came together really nicely and I heard they were a hit at the celebration.


So congratulations MCM and many thanks the hostess with the mostess, Jane!

Monday, October 24, 2011

Cookie Cupcake Toppers

Two weekends ago we attended our friends' son's baptism. The guest of honor's mom mentioned that she would be making cupcakes for the luncheon afterward, so I asked her if I could make some cookie cupcake toppers for them. She agreed and I got to work! I baked mini cookies onto toothpicks so we could easily slide them into the red velvet cupcakes. For the cookies, I focused on initials, monograms and crosses.

In the end the display made for a cute centerpiece at a very nice event.


Thanks for a wonderful afternoon H family!

Friday, October 21, 2011

TUTORIAL: How to Make Decorative Pumpkins - Three Ways

It is hard to believe that Halloween is just around the corner. I have not even made the "closet switch-over" from summer to winter, let alone done much decorating for fall. In years past though, I have spent time making some pumpkin decor that I can reuse from year to year. All three of these ideas are very simple so I thought I would combine them into one post as a tutorial. While I do not have step-by-step photos, I will type out what you need and the steps to take. Hopefully between that and the final photos, you will get the idea. (I know you will!)


1.) Glitter Pumpkins

To make these you will need:

-Foam pumpkin, any size
-Mod Podge
-Glitter
-Foam paint brush
-Ribbon
-Scissors

To make the glitter pumpkins, lay your foam pumpkin onto a sheet of newspaper. Using the foam brush, spread the Mod Podge all over the pumpkin. Generously shake glitter to coat the Mod Podge until it is covered. Allow to dry, shake off excess and tie a ribbon around the top. And you're DONE. :)


2.) Monogrammed Pumpkins

To make these you will need:

-Foam pumpkin, any size
-Mod Podge
-Foam paint brush
-Scrapbook paper
-Pencil
-Printed letter in the font of your choice to trace
-Scissors

To make the monogrammed pumpkins, print a letter in the font of your choice as large as you would like and cut it out to use as a stencil. Take your stencil and lay it on your scrapbook paper. Trace with pencil and then cut the letter out. Paint Mod Podge over the back side of the letter and then press it against the pumpkin. Paint Mod Podge over the front of the letter and then give the entire pumpkin a coat of it as well. Allow to dry and tie a ribbon at the top.


I had some friends over two Halloweens ago to make both the glitter and monogrammed pumpkins. We went with smaller pumpkins at the party, but large work with all three projects as well.


3.) "Lilly" Pumpkins

To make these you will need:

-Foam pumpkin, any size
-Mod Podge
-Foam paint brush
-Scissors
-Cocktail napkins in the pattern of your choice (I used Lilly!)
-Ribbon

To make the Lilly pumpkins, cut a few cocktail napkins into small pieces. Working in sections, paint Mod Podge over about 1/4 of the pumpkin. Adhere the cocktail napkin pieces onto the pumpkin, overlapping the edges so that there is no orange (or white) showing. Continue doing this all the way around the pumpkin. Cover all of the napkins/pumpkin with a top coat of Mod Podge. Allow to dry and tie a ribbon around the top. The possibilities are endless with this one - sports teams, prints, characters, etc. Whatever suits your fancy!


There you have it - "homemade" pumpkins, three ways. :)

HAPPY Halloween!

Tuesday, October 18, 2011

Flower Shower

I love flowers. I grew up with parents who are excellent gardeners but never really caught the green thumb bug myself until about 6 years ago. While I have absolutely no space for a vegetable garden, I have packed our small patio area with flowers, much to the amusement of friends who visit and also to the delight of a neighbor who has dropped off baked goods for us as a "thank you for the pretty flowers."

This is the first fall where I have dahlias growing as a result of planting bulbs over the summer. I had dahlias in my wedding bouquet as they are a flower that has always grown at my family's home and it is nice to have some of my own this year.


So when I heard that my friend was having a summer garden themed bridal shower for her future sister-in-law, I was excited to make the cookie favors for the event. K said that the bride's flowers were mostly purple with red berries, leading me to free-hand bouquets matching that description. To vary the favors, I also did a whimsical cookie with flowers buds to compliment the bouquets.


Hurricane Irene ended up altering the guest list, but hopefully the flowers were cheery in the rain anyway. ;) Thank you very much Katie!

Monday, October 17, 2011

PINK Baby Showers

One Preppy Cookie sees a LOT of baby showers. Some are themed and some stick with the classics (bottle, onesie-esque classics that is.) I have a few photos to share from two classic baby girl showers I made cookie favors for recently.

Pink bottle and onesie cookies for one...


And pink baby carriage, rattle, bottle and onesie cookies for the other.


Many thanks to Becky and Carmen! And here's to my favorite color...PINK.

Thursday, October 13, 2011

Nesting

I have said this before but one of my favorite things that has happened since starting One Preppy Cookie has been reconnecting with old friends. A few weeks ago I was happy to hear from a friend and fellow Hokie who I spent nearly all of my college breaks working retail with. She was planning a baby shower for her friend and wanted to bring cookies as favors.

She sent me the invitation as inspiration and I thought it was so cute that I decided to draw it onto each cookie favor.


The shower was a "nest" theme, so why deviate?


Thank you very much Lindsay - I hope it doesn't take us so many years to see each other again. :)

Wednesday, October 12, 2011

Boys vs. Girls Birthday Theme of Choice

About a month ago I made cookies for my good friends' children. Their birthdays are four years and one week apart and it was fun to see the difference in their interests.

Of course mom and dad had to step in to communicate the one year old little brother's wishes. These days he is into the Berenstain Bears and cars. I kept that in mind and mixed in a few other birthday cookies to make it a festive mix. I received a CUTE photo of little J enjoying one of his "Brother Bear" cookies and he looked as though he gave it two thumbs up!


Big(and much more sophisticated of course) sister chose a "princess and horse" theme for her cookies. I have been a part of A's life from the beginning and have loved seeing her girly side develop. This cookie theme was a perfect choice for the birthday girl and when I went to her house to drop them off, the first thing she did was confirm that I had remembered the horses. ;) Then she asked me if I had included a Buzz Lightyear cookie. (???) Oh well, I guess maybe we know next year's theme already! To carry out the princess theme I included sparkly shoes, dresses, scepter wands and of course a castle. (I am sure Buzz would prefer not be be wearing a dress and sparkly heels anyway!)


So happy (now belated) birthday A & J! Looking forward to seeing what you're into next year.

Tuesday, October 11, 2011

The Preppy Baby (Shower)

A Lilly Pulitzer themed baby shower?? Yes please. :)

You know by now that I have a love for all things Lilly. Apparently that word has spread and I am loving all of the preppy, Lilly P. requests I have been receiving!

Last month I was contacted about making Lilly shift dresses and pink & green polka dot onesies for a preppy baby shower in Florida. Of course I was excited to participate in that and enjoyed getting to work on these.

The hostess ordered shift dresses to be served at the party:


And personalized onesies to give to guests as favors:


Here's hoping the party was as successful as the theme was cute. Thank you Tiffany!

Friday, October 7, 2011

A Tribute to the Bachelorette!

When a friend of mine asked me to make cookies to bring to a Bachelorette Party, I assumed she would be interested in the "traditional" bachelorette designs. Instead she wanted to personalize the mix a bit. She gave me a few facts about the guest of honor and said she trusted me from there. The list included that the bride-to-be lives in Philly, will be having a Key West wedding, is a teacher and a University of Maryland grad. Hmmm, I had to think about that for a few days before I determined what I wanted to do. I decided to play on that knowledge and came up with the apple cookie in her married name to represent her profession, a UMD tee to support her alma mater, shells for the beach wedding, the LOVE statue for Philly, engagement rings and champagne (it was a Bachelorette Party after all!)

I think in the end it all worked well together.


So cheers to the Bachelorette. And many thanks to you Susan!

Thursday, October 6, 2011

Polka Dot & Cupcake Birthday Cookies

When my friends' sister-in-law contacted me about doing cookies for her daughter's first birthday party, I was happy to do it. When she told me that she was decorating with pink, green and turquoise polka dots and I could just take it from there, I was even happier. This was RIGHT up my alley and I had a great time making these. I have noticed that sometimes the simplest cookies generate the most positive feedback and that was certainly the case here.


Thankfully the birthday girl's uncle (a.k.a. my friend Kevin) is a far finer photographer than me and captured this photo of the favors at the party. I love it.


Thank you once again Anna! Congratulations on your little Lulu turning one. :)

Wednesday, October 5, 2011

TUTORIAL: How to Make a Ribbon Topiary

As promised, this morning I am going to show you how to make the topiaries I made for my friend's daughter's Sesame Street birthday party over the weekend. These are fairly easy to make and add a lot of color to a party. I have made them for baby showers in the past and decided to make these even more whimsical. I knew my mission was accomplished when the birthday girl saw these on her cake table and exclaimed, "Whooooa!" (Okay, maybe she said that about the cake, but I'd like to think these played a role.) :D


To make one ribbon topiary you will need:

-About 6 spools of ribbon in various sizes cut into 2.5 inch long strips
-Topiary frame or dowel rod and styrofoam ball
-Flower pot
-Paper shred
-Spray paint
-Hot glue
-Pins
-Pipe cleaners


You can make these using a styrofoam ball and a dowel rod, but I find that it is cheaper and less labor intensive to purchase a pre-made topiary form if you can find one (I have seen them at A.C. Moore and Hobby Lobby.)


I spray painted my topiary frame and flower pot white. Allow to dry overnight. Insert topiary into flower pot (mine fit perfectly and did not require any additional securing.)

Using your hot glue gun, place glue along the base of your topiary and attach paper shred to cover it. (Just glue the base; the rest of the shred will pile on top.)

Next hot glue ribbon around the base of the flower pot and tie a bow toward the top of the stake.


The next step is where you will spend the majority of your time. Take the ribbon pieces and fold them into a loop. Use your pins to attach the ends of the loop into the foam circle. Repeat this process again and again to fill in the gaps. Start with the larger ribbons and fill in with the smaller ones. I start at the top and work my way to the bottom, keeping in mind that the bottom layer is important as your guests my be sitting at a table looking up at it. (Note: I use two pins for pieces of ribbon one inch or wider and one pin for the smaller ribbons.)


If you would like to add "squiggles" for an extra whimsical punch, wrap a pipe cleaner around a marker to curl it. Then slide the pipe cleaner off of the marker and stretch the ends out a tad to give them some volume.


Take a pencil and poke a hole into the foam where you want your pipe cleaner to be. Then insert the pipe cleaner into the hole (no glue needed.)


Continue adding pipe cleaners until have you achieved the look you're going for.


And VOILA! You're done. :)


After the paint dries, this project should take you about an hour to an hour and a half or so per topiary. They can be adapted to any holiday or occasion and used from year to year, so the time investment is worth it!

Please let me know if you have any other questions. Happy crafting!

Monday, October 3, 2011

Sesame Street 2nd Birthday Party

So yes, we lost the BIG game. Thankfully I had a very happy event to help distract me from that. Over the weekend we drove to our good friends' daughter's second birthday party. The theme was Sesame Street and the bday girl's mom left no detail unattended.

I offered to bring cookies and ran with the theme. We decided on character cookies as favors and "S" and "2" cookies to be served alongside the cake (which was ordered from a local bakery - so cute!)


(Be on the lookout this week for a tutorial on how to make those topiaries!)


It was so fun to watch the kids' reactions to the cookies...that always make the hard work MORE than worthwhile. Needless to say a good time was had by all.

Hope you all have a wonderful week!