
1.) I am not a professional photographer (nothing new to you I am sure.)
2.) It is hard to demonstrate something with one hand while photographing with the other, so my apologies in advance for the shadows!
Okay, now that I have that off my chest, let's get started. You will need:
-One batch vanilla mini cupcakes, prepared (homemade or box is fine)
-One batch brownies, prepared (if using a box, splurge on Ghiradelli please!)
-One batch prepared vanilla buttercream icing (or one large can)
-Coconut
-Red, yellow and green food coloring
-Sesame seeds (optional)
Once your brownies have cooled, take a small circular cookie cutter and cut out your "hamburger patties" just like you would cut shapes into sugar cookie dough.


Allow your cupcakes to cool and then peel off the wrappers. (Do not skip baking them in wrappers or they will become overly brown.)

Cut the center out of the cupcake, leaving you with the top and bottom "bun."

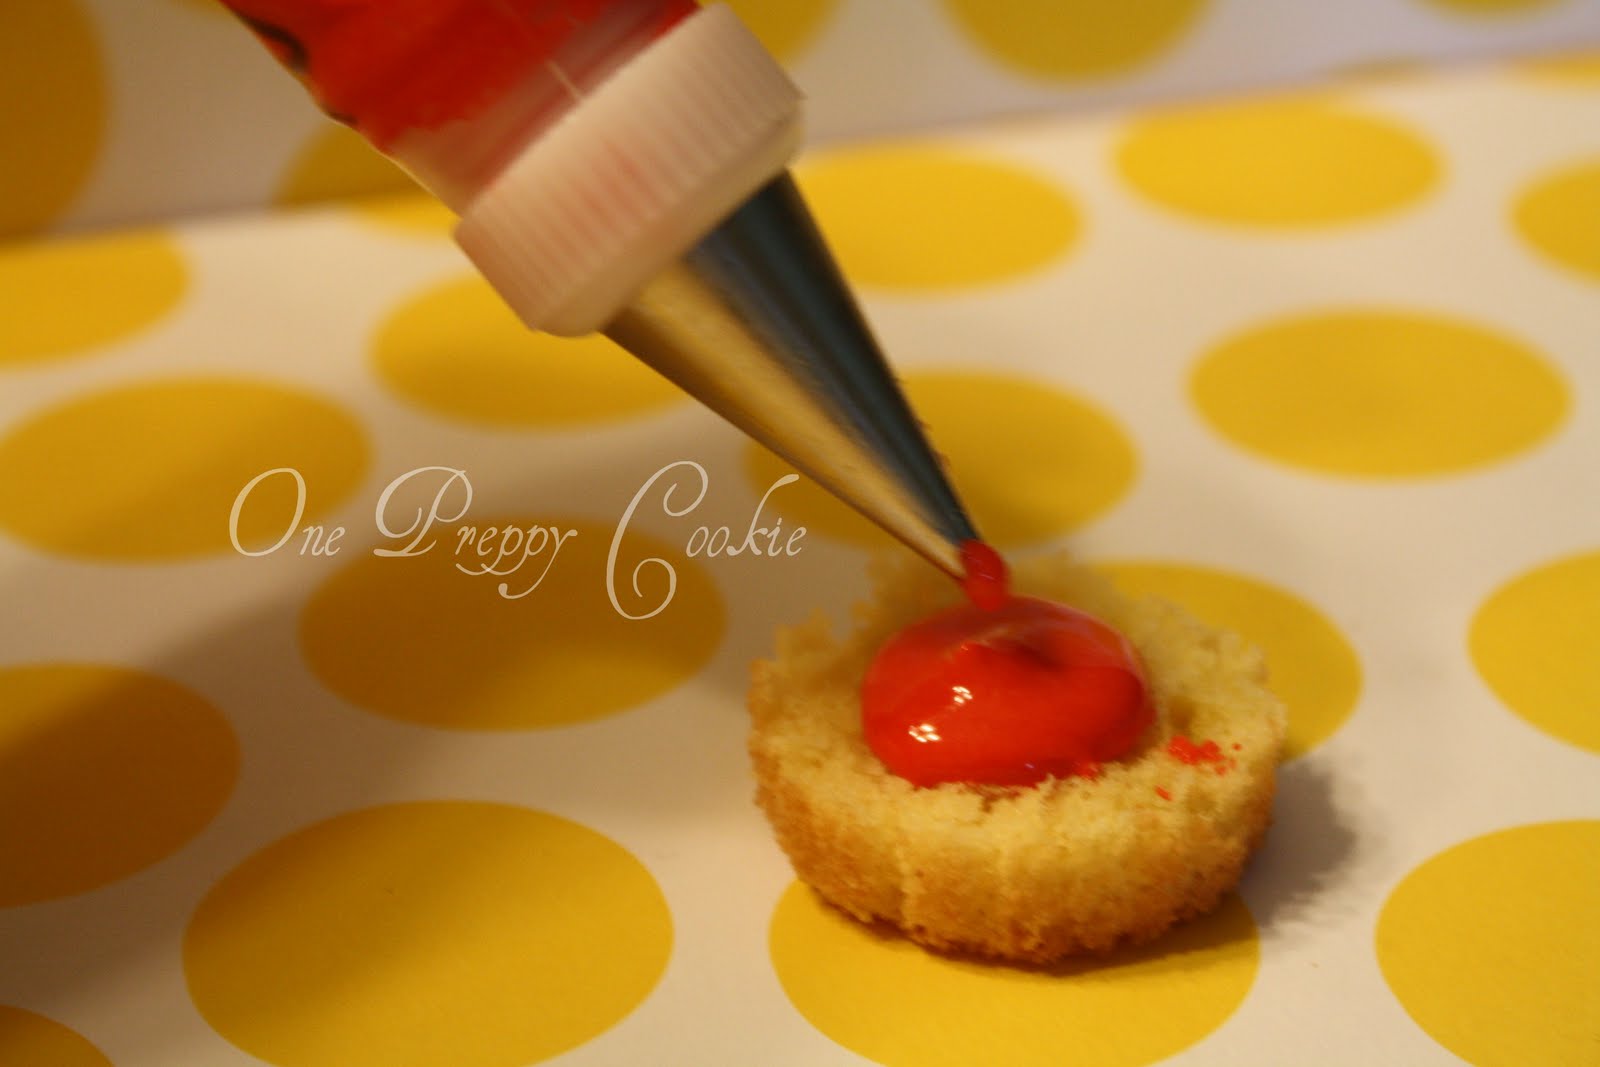
Die one half of your icing red. Fill a piping bag (or sandwich bag with the end snipped) with it and apply your "ketchup" to the bottom of the cupcake.
Add your "patty" and then top with yellow icing as your "mustard" or "cheese."

Add green die and coconut to a plastic bag and shake it up until your "lettuce" is ready.

Add your "lettuce" on top of your icing.

Add the top half of your "bun."

Optional: Mist (or use your finger to add) a small amount of water on top of the bun. Sprinkle sesame sesame seeds on top of water. You won't taste them and they add a lot to the presentation! I found that adding a toothpick on top made them look more like sliders. (Maybe that was only in my imagination, but I liked it!)

This yields quite a few cupcakes. (If I had used every ingredient, I probably could have done 2-3 dozen depending on how generous I was with icing.)
Let me know if I missed anything, but otherwise please enjoy!


wowwwwwwwwwww...bellissimo tutorial, spiegato bene e poi sono bellissimi....brava brava, li farò sicuramente!
ReplyDeletea presto,
ciaoooooooooooooooooooooo
they look so great, and it sounds like a lot of work! plus i love your polka dot backgrounds...is that your countertop???
ReplyDeleteHow creative and so yummy looking! Fantastic!
ReplyDeletehi! i'm jenny's bff from home and found your page through her (and our mutual blog designer - danielle moss!). your cookies are AMAZING! do you ship to NC????
ReplyDelete