Friday, March 30, 2012

April Fool's Day "Food"

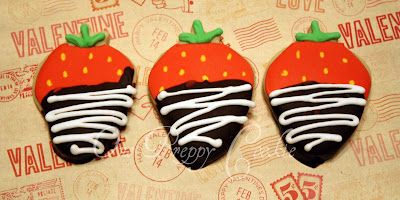
Over the past few days I have come across many April Fool's Day "fake food" ideas. From cupcakes looking like mashed potatoes to cookies looking like pizza, the creativity is endless. While I am not sure I have ever pulled an April Fool's joke on anyone, coming across these ideas did remind me of just how many food & drink cookies I personally have made. That inspired me to gather them together for you to enjoy this morning. From hamburger cupcakes to plates of spaghetti to ice cream cones and even a few cold beers, it seems I have a good start on a complete meal or two. :)


Wishing you all a wonderful weekend...and a happy April Fool's Day!

Wednesday, March 28, 2012

Baby Baby Baby Oh!

Funny story: The other morning as I am getting ready for my work day to start, I scrolled through Facebook on my phone only to find the following status update from my husband. "Ahhhh! Just turned up the volume to a catchy new song on the radio... to find out it was Beiber!" I about died laughing. You see he very rarely posts anything on Facebook unless it has to do with sports or politics. To think that he would post an admission like that was somewhat shocking...and generated quite the reaction from his friends. I haven't heard the song yet, but when I was thinking of a title for this post the Beibs immediately popped into my head thanks in part to that Facebook status crack-up.

If you have been reading this blog for a while you know that I make a LOT of cookies for baby showers. (If I had been writing this blog five years ago, you would see me making a LOT of bridal shower cookies, so this evolution only makes sense.) I have mentioned before that onesies are by far my number one request but sometimes people switch it up a bit. When a friend asked me if I could make a silhouette of a mom-to-be I said yes and hoped I could make it happen. She asked for a pink and blue heart on the stomach to represent her twins and I love how the cookies turned out in the end.


Of course no baby shower would be complete without onesie cookies. We added both pink and blue with a few yellow and gray striped cookies to represent the babies' bedding.


Thank you Beth and congratulations on the arrival of your little ones!

Tuesday, March 27, 2012

Chicken Cashew Chili - A WINNER!

Yesterday my office had their annual chili cook-off. (Unusual time of year for it, but the weather DID cool down in time for the occasion!) I was the reigning champion, submitting a modified version of a friend's recipe last year. I decided to go with a different recipe this year and to my surprise won the "Best in Show" award. The irony in me now holding a two year chili title is that I have not eaten any meat (at all) since I was five years old. I do however love to cook and always test my carnivore recipes on family and friends, taking their feedback as I will never taste them myself. If only I thought a vegetarian chili would be a contender in this contest! In the meantime, I thought I would share this year's winning recipe with you...and once football season starts up again I will post last year's winner.


Chicken Cashew Chili

Ingredients:
4 dried ancho chiles
32 oz. chicken broth
2 tablespoon canned chipotle chiles in adobo (the sauce part only)
2 cups salted roasted cashews
1/4 cup olive oil
2 large onions, coarsely chopped
6 garlic cloves, finely chopped
2 tablespoons ground cumin
2 teaspoons salt
1 cooked rotisserie chicken, shredded
1/2 cup chopped fresh cilantro
2 (14.5 oz) cans diced tomatoes in juice
1 ounce bittersweet chocolate, chopped
1 (15 oz) can kidney beans, rinsed and drained
2 tablespoons chopped jarred mild jalapeno peppers, chopped

Make the chile puree: Heat a dry small heavy skillet (not nonstick) over moderate heat until hot. Toast the dried chiles, one at a time, pressing down with tongs, for several seconds on each side to make them more pliable. Seed and devein dried chiles; discard stems. Tear dried chiles into pieces and transfer to a blender. Add broth, adobo sauce and cashews and puree until smooth. (Note: if you want a spicier chili, retain some of the seeds.)

Make the chili: Heat oil in a heavy pot over moderate heat until hot but not smoking. Add onions and garlic and cook, stirring, until softened, 5 to 7 minutes. Add cumin and salt and cook, stirring, for 1 minute. Add chicken and stir to coat with onion mixture. Stir in chile puree, 1/4 cup cilantro, and tomatoes with juice. Stir in cooked shredded chicken. Cook over moderate heat, stirring, until chili is heated through and chocolate is melted. Allow to simmer on low heat at least 30-45 minutes.

Source: Adapted from The Freckled Citizen via "Gourmet Today" cookbook

Friday, March 23, 2012

Happy Hunger Games!

The Hunger Games. This series of books consumed my free time until I finished all three without coming up for air. I never thought I would like this type of book, but boy was I wrong. Never mind that they are found in the "Young Adult" section of the bookstore, they are GOOD.

I have been wanting to make Hunger Games cookies for weeks, but alas there is very little time for me to make cookies for "fun." Hence I am not overly happy with these but thankfully have two more movie premiers in my future to improve.


I won't be seeing the movie for two weeks as a friend and I made a pact to wait to see it until she visits for the weekend. That doesn't mean that I don't want to your opinions on how it is though. Please let me know what you think!


"HAPPY Hunger Games!"

Thursday, March 22, 2012

Smoothie Cookies

My love for Tropical Smoothie Cafe goes back years. The only problem? There has never been one overly close to where I live or work. I would go out of my way to stop there when visiting friends or out of town for work. Until one day I saw a sign that it was coming to the plaza where my office is located. I nearly fell out of my car that day, leaning over as far as I could to confirm what I saw. :) Many a lunch outing has been enjoyed there over the past few months and it is fair to say that the novelty hasn't worn off just yet.

That it why it was ironic when a friend asked me to make cookies for her friend that was opening a TSC in New York a few weeks ago. I knew I wanted to do my take on their smoothie cups and then mixed in a few extra colorful designs for a cheery accent.


I suppose this was my cookie take on an edible arrangement.

Thank you Jenny!

Tuesday, March 20, 2012

SPRING Has Sprung!

Happy Spring! Someone should tell Mother Nature that TODAY is the first day of spring. She must be confused as she has delivered summer-like weather for weeks now. I keep hesitating to do the big "closet switch over" anticipating colder temperatures at some point but I am starting to think it is time. Wearing tights and wool when it is eighty degrees can only go on for so long! And now that the Cherry Blossoms have peaked in an unusually early fashion, spring is officially here.

I thought these were the perfect cookies to share on the first day of spring. They were for a six year old's birthday tea party. (LOVE that theme!) We went with cheery colors and a whimsy theme. I have done this theme a few times and it never gets old for me.


Thank you Meaghan! I hope your birthday girl enjoyed these.

Wishing you all a wonderful day!

Friday, March 16, 2012

St. Patty's Vanilla Gooey Butter Cookies

Want to know a secret? I am not a sweets fanatic. I think I may have told you that before and it's true. I definitely LIKE sweets but give me the option of chocolate cake or cheese fries and I would choose the later. However there are certainly times I make exceptions to that tendency. Two years ago at our second annual cookie exchange, my friend made DELICIOUS chocolate crinkle cookies. They tasted exactly like Dunkin Donuts chocolate glazed doughnuts and I could not stop gobbling them down. I thought about them often but thankfully never made them again.

Well last month at the beautiful bridal shower I attended, there was a cookie there that caught my attention. One cookie quickly turned into three and I could not get over how good they were. I asked my friend Tiffany, the baker of THE cookies, who told me that it was Paula Deen's chocolate crinkle recipe, just with a white cake mix instead. That made perfect sense - it was the SAME cookie that swayed me over to the sweet side just as it had two years ago.

The great thing about this cookie is that you could make it however you like. Tiffany made them with funfetti cake mix at her sister's bridal shower last weekend and I know red velvet and strawberry would be good too. This week I decided to go with the same version I loved at the bridal shower, just with a little green dye to get in the St. Patrick's Day spirit.


This is an easy recipe that I promise you people will rave about...even us savory lovers!

St Patty's Vanilla Gooey Butter Cookies
Original recipe from none other than Paula Deen y'all!
Adapted by my friend Tiffany

Ingredients:
1 (8-ounce) brick cream cheese, room temperature (I used Neufchatel)
1 stick butter, room temperature
1 egg
1 teaspoon vanilla extract
1 (18-ounce) box moist vanilla cake mix
Green food coloring (just a couple small drops will go a long way)
Confectioners' sugar, for dusting

Directions:
Preheat oven to 350 degrees F. In a large bowl with an electric mixer, cream the cream cheese and butter until smooth. Beat in the egg. Then beat in the vanilla extract. Beat in the cake mix. Add small amount of green food coloring and mix until incorporated. Cover and refrigerate for 2 hours to firm up so that you can roll the batter into balls. Roll the chilled batter into tablespoon sized balls and then roll them in confectioner's sugar. Place on an ungreased cookie sheet, 2 inches apart. Bake 12 minutes. The cookies will remain soft and "gooey." Cool completely and sprinkle with more confectioners' sugar, if desired.

Thursday, March 15, 2012

Winter ONEderland

This has been a very odd winter. My gardenia topiary that I left outside all "winter" is still alive, my daffodils bloomed weeks ago and people at my office were wearing capri pants this week. The temperature has hit eighty the past two days yet I still have a closet full of wool to wear. It has been quite odd.

Perhaps that is why I really enjoyed making some wintry cookies last week for a friend's daughter's Winter ONEderland birthday party. The theme was snow and snowmen. It was a nice change considering that the weather seems to dictate a watermelon and bikini theme these days.

I went with snowflakes, snowmen heads and "snowy" number ones for the big event.


Loved this creative idea Sarah - thank you!

Wednesday, March 14, 2012

Sporty Spice

I've never been overly "sporty." Sure, I've run a few short races, done boot camp exercise trainings and have fallen in and out of gym routines over the years. However growing up I was never on an organized sports team aside from two or three summers on our community's swim team. Later in life I revealed to my parents that I cried myself to sleep on the eve of every swim meet. They of course felt terrible but sports have just never been my thing (even though my mom bribed me with a full size candy bar every day after practice.) I always preferred dance lessons and Student Government to field hockey and softball.

Enter a sporty four year old I had the pleasure of meeting last Friday night. At only four he is already a Lakers, Redksins and Yankees fanatic. His mom (a sorority sister of mine) incorporated his love for sports into his birthday cookies and I was happy to roll with her ideas.


Does watching Khloe and Lamar count as being familiar with the Lakers?? :)


I have a Pittsburgh Pirates-loving husband who may want to follow this boy's lead and consider converting to a Yankees fan if he wants to see his team in the World Series any time soon...


And although I cheer for them every year, I think we all know that the Redskins need to come up with a plan too. With a fan like last weekend's birthday boy leading the pack, here's to things turning around in no time!


So there is my dose of sports for the week. I hope you enjoyed!

Thank you very much April! I loved getting to meet your adorable family.

Monday, March 12, 2012

The Final Rose

Oh, The Bachelor. I have been an incredibly loyal fan to a show that often frustrates me. I can get past the silliness of the overall premise of twenty five women competing for one man, but ABC sure knows how to tug at my nerves with some of the antics they pull (think the Jason/Melissa/Molly saga.) And don't even get me started on why the heck they gave Bachelor Brad two chances. Ben is among my least favorite Bachelors to date but of course I still watch. I suppose I will continue holding out hope for another Andrew Firestone to enter into the "quest for love."

So in honor of tonight's season finale, I wanted to share the rose cookies I made recently for a baby shower. They are topped with buttercream icing instead of royal and if they were red instead of pink, would probably make Chris Harrison proud. :)

(These photos are brought to you by another obsession of mine - Instagram. You can follow me along at onepreppycookie.)


Thank you as always Mary!

Happy Monday everyone.

Friday, March 9, 2012

The Police

It's Friday! And I am thrilled about that. :) I've had a busy week between working, cookie making and sneaking in my beloved Zumba classes. I haven't been the best blogger lately but I have SO many cookie designs that I am excited to show you when I make the time to get all of the posts done.

First up - police cookies a friend requested to send to her friend who was just accepted to the Police Academy in his town. I decided to hand cut a few hats and badges to go along with jackets and police cars. I loved the idea of sending these as a congratulations and was happy with how they turned out.


Maybe if I ever get pulled over for speeding, I could show the Officer this photo with an "I owe you" to avoid a ticket?! Yeah, probably not! Oh well.

Thank you Cara! Very creative idea as always.

Wishing you all a very happy weekend - enjoy!

Thursday, March 8, 2012

Happy 1st Birthday Hippos (and Birds!)

Last week I made cookies for a friend from high school's daughter's first birthday party. This friend and I were coworkers at a daycare after school, watching over the two year old room when we were only 17/18. It's amazing to think how quickly times flies and now her daughter is on her way to being old enough to be in that room we once worked in.

She sent me samples of the paper goods being used and let me go for it from there. The focus of the party ware was hippos and birds in bright colors. (Love!) I decided to hand cut shapes to draw the hippo heads on. Next up were the birds and I rounded it all out with some number ones for the birthday girl. (They were personalized but I missed taking a photo of that part.)


I made two extra cookies on sticks to put into her cake although I did not ask permission to share the photo...maybe next time!

Thank you very much Rachel - your little T is just precious!

Monday, March 5, 2012

Birthday Cake Oreo Stuffed Funfetti Cookie Bars

Have you ever seen the show Extreme Couponing? My friend got me into it a while ago and once I watched there was no turning back. If you've watched it then you should be familiar with the "stockpile" concept. I am certainly not the proud owner of any sort of stockpile when it comes to groceries, although I must admit it has crossed my mind to stockpile every bag of Limited Edition Birthday Cake Oreo available at my grocery store. In fact I was caught red-handed by a friend last weekend at the store. She couldn't stop laughing when she saw my grocery bag full of the cookies! Oh well.

When preparing for dinner at a friend's house last weekend, I wanted to make a dessert to bring. This particular friend loves dessert and has had many of my "go-tos" so I wanted to bake something different. I decided to try something new based off of a delicious recipe my friend Linda gave me almost 10 years ago. Linda is famous for her cookie bars and I always looked forward to the days she would bring them into the office. I have been making them for years now and they are always a hit. Her dessert partnered with my new-found love for Birthday Cake Oreos resulted in this delicious hybrid I wanted to share with you. These bars are easy, quick and sure to make your friends (or self) happy!


Birthday Cake Oreo Stuffed Funfetti Cookie Bars

(Note: You can see that I baked these in my cookie bar pan, but next time I would just bake them in an 9x13 pan.)

Ingredients:
1 package Funfetti cake mix
¼ cup water
2 eggs
¼ cup margarine, softened
¼ cup brown sugar
1 package Birthday Cake Oreos

Directions:
Preheat oven to 375.
Combine ½ of cake mix with everything except Oreos. Mix well. Add remaining cake mix. (Mixture will be very thick.) Place half of the batter into a 9x13 pan that has been greased and floured. Layer Oreos on top of batter (see pictures above.) Top with remaining batter. Bake approximately 20 minutes. Cool and cut into bars.

Thursday, March 1, 2012

Gumby's Pokey Stix Copycat Recipe

When I was in college, Gumby's Pizza was an integral part of a fun evening out. We would call (from our land lines of course) to order Pokey (or "Hokie" at my school) Stix, drown them in ranch dressing and have a great time recapping our evening. This was a tradition that sadly only continued as alumni whenever my friends and I returned to campus for a game. To my amusement when I first started going to Penn State with my now husband and his group of friends, I quickly discovered that they too had a Gumby's and ordered Pokey Stix many times themselves. This love for "Pokeys" developed into calling the State College location whenever we traveled to a football game, picking up the delicacies as we pulled into town and carrying them out to our tailgates. I don't know anyone who loves them more than my friend Laura, so of course it was only a matter of time until we tried a copycat recipe. Enter Pinterest. I was able to find several copycat recipes but in the end went with the one who took it to the detail of mentioning that margarine tasted "more authentic" than butter in this recipe. I knew she meant business and I was sold. :) I partnered them with my now go-to pizza crust recipe and we were in business.


They passed Laura's test and her son C seemed happy with his first Pokey Stix experience too so of course I knew I needed to share the recipe with my fellow Hokies, Nittany Lions and other Gumby's Pizza fans. Enjoy!


Pokey Stix
Inspiration from Gumby’s Pizza

For the Topping:
(Note: I doubled this topping recipe as I used the entire pizza crust recipe below.)
2 Tbls Parmesan Cheese
1/4 tsp salt
1/4 tsp black pepper
1/2 tsp garlic powder
1/2 tsp Italian seasoning
1/2 tsp onion powder
1/4 cup margarine, melted
1 cup Mozzarella Cheese

For the Pizza Dough:
Ingredients:
½ cup warm water
1 envelope instant yeast
1 ¼ cups water, room temperature
2 tbsp. olive oil
4 cups bread flour, plus more for dusting
1 ½ tsp. salt
Olive oil or non-stick cooking spray for greasing the bowl

Directions for the Pizza Crust:
Measure the warm water into a 2-cup liquid measuring cup. Sprinkle in the yeast and let stand until the yeast dissolves and swells, about 5 minutes. Add the room temperature water and oil and stir to combine.

Place the flour and salt in the bowl of a stand mixer fitted with the paddle attachment. Briefly combine the dry ingredients at low speed. Slowly add the liquid ingredients and continue to mix at low speed until a cohesive mass forms. Stop the mixer and replace the paddle with the dough hook. Knead until the dough is smooth and elastic, about 5 minutes. Form the dough into a ball, put it in a deep oiled bowl, and cover with plastic wrap. Let rise until doubled in size, about 1 ½ to 2 hours. Press the dough to deflate it.

To bake, place a pizza stone in the lower third of the oven. Heat the oven to 500° for at least 30 minutes. Turn the dough out onto a lightly floured work surface. Let the dough relax for at least 10 minutes but no more than 30 minutes.

Working with one piece of dough and keeping the other covered, shape the dough and transfer to a pizza peel or round of parchment dusted with cornmeal. Top as desired. Slide the dough onto the pizza stone. Bake until the crust edges brown and cheese is golden brown in spots, about 8 to 12 minutes.

Directions for the topping:
Combine all ingredients except for mozzarella cheese. Spread mixture all over pizza dough. Top with cheese. See baking directions in pizza crust recipe above.

Sources: Annie's Eats Pizza Crust/Dinners Dishes and Desserts Topping