Thursday, March 1, 2012

Gumby's Pokey Stix Copycat Recipe

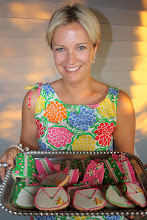
When I was in college, Gumby's Pizza was an integral part of a fun evening out. We would call (from our land lines of course) to order Pokey (or "Hokie" at my school) Stix, drown them in ranch dressing and have a great time recapping our evening. This was a tradition that sadly only continued as alumni whenever my friends and I returned to campus for a game. To my amusement when I first started going to Penn State with my now husband and his group of friends, I quickly discovered that they too had a Gumby's and ordered Pokey Stix many times themselves. This love for "Pokeys" developed into calling the State College location whenever we traveled to a football game, picking up the delicacies as we pulled into town and carrying them out to our tailgates. I don't know anyone who loves them more than my friend Laura, so of course it was only a matter of time until we tried a copycat recipe. Enter Pinterest. I was able to find several copycat recipes but in the end went with the one who took it to the detail of mentioning that margarine tasted "more authentic" than butter in this recipe. I knew she meant business and I was sold. :) I partnered them with my now go-to pizza crust recipe and we were in business.


They passed Laura's test and her son C seemed happy with his first Pokey Stix experience too so of course I knew I needed to share the recipe with my fellow Hokies, Nittany Lions and other Gumby's Pizza fans. Enjoy!


Pokey Stix
Inspiration from Gumby’s Pizza

For the Topping:
(Note: I doubled this topping recipe as I used the entire pizza crust recipe below.)
2 Tbls Parmesan Cheese
1/4 tsp salt
1/4 tsp black pepper
1/2 tsp garlic powder
1/2 tsp Italian seasoning
1/2 tsp onion powder
1/4 cup margarine, melted
1 cup Mozzarella Cheese

For the Pizza Dough:
Ingredients:
½ cup warm water
1 envelope instant yeast
1 ¼ cups water, room temperature
2 tbsp. olive oil
4 cups bread flour, plus more for dusting
1 ½ tsp. salt
Olive oil or non-stick cooking spray for greasing the bowl

Directions for the Pizza Crust:
Measure the warm water into a 2-cup liquid measuring cup. Sprinkle in the yeast and let stand until the yeast dissolves and swells, about 5 minutes. Add the room temperature water and oil and stir to combine.

Place the flour and salt in the bowl of a stand mixer fitted with the paddle attachment. Briefly combine the dry ingredients at low speed. Slowly add the liquid ingredients and continue to mix at low speed until a cohesive mass forms. Stop the mixer and replace the paddle with the dough hook. Knead until the dough is smooth and elastic, about 5 minutes. Form the dough into a ball, put it in a deep oiled bowl, and cover with plastic wrap. Let rise until doubled in size, about 1 ½ to 2 hours. Press the dough to deflate it.

To bake, place a pizza stone in the lower third of the oven. Heat the oven to 500° for at least 30 minutes. Turn the dough out onto a lightly floured work surface. Let the dough relax for at least 10 minutes but no more than 30 minutes.

Working with one piece of dough and keeping the other covered, shape the dough and transfer to a pizza peel or round of parchment dusted with cornmeal. Top as desired. Slide the dough onto the pizza stone. Bake until the crust edges brown and cheese is golden brown in spots, about 8 to 12 minutes.

Directions for the topping:
Combine all ingredients except for mozzarella cheese. Spread mixture all over pizza dough. Top with cheese. See baking directions in pizza crust recipe above.

Sources: Annie's Eats Pizza Crust/Dinners Dishes and Desserts Topping

Tuesday, February 28, 2012

Little Princess

I love "girly" girls. Many of my friends have very girly daughters and I never get tired of playing dress up with them or pretending that their baby dolls are real. So when a friend asked me to make fabulous princess cookies for her very girly niece, I was inspired! Instead of the Disney route, we went with a classic princess theme, complete with the token shoe, castle, crown, horse, frog and of course a princess complete with the birthday girl's hair color (and of course a preppy strand of pearls.) Add in some bright colors, glitter and sprinkles and I think the theme was complete. See the cookies in the top left corner? The simple "4" cookie surrounded by sprinkles. It's one of my favorites. The least amount of work in the bunch, but a fun standout nonetheless.


Here's hoping that this little princess loved them.

Thank you Elisa!

Friday, February 24, 2012

Birthday Cake Oreo Cupcakes

When a friend told me about Birthday Cake Oreos, I was intrigued. That intrigue turned into a full on hunt for the limited edition Oreos made in honor of the cookie's 100th birthday. Once I finally found them, I had to resist the urge to hoard every bag in the grocery store (flashback to Lilly Pulitzer Animal Crackers!) My original intent was to make truffles out of them, but after eating more Birthday Cake Oreos than I care to admit (think the delicious taste of Funfetti in the middle) I decided to bake them into cupcakes for friends in an effort to get them out of my reach.


I've made variations of Oreo cupcakes before. My husband chose mint for his birthday and I brought vanilla cupcakes with chopped Oreos in the batter to a friend's dinner party. There are plenty of possibilities to choose from! This week I decided on a chocolate cupcake with Oreo buttercream although I know a "Funfetti" vanilla cake would be great too. If you have time to make the cupcakes from scratch, go for it! Otherwise feel free to doctor a cake mix as I did this time. (No one will judge - trust me. Especially when they see this surprise Oreo at the bottom of their cupcake.)


Birthday Cake Oreo Cupcakes

Ingredients:
For the Cupcake:
1 box chocolate cake mix of your choice
1 stick melted unsalted butter
Replace the water on the box with milk
Add one extra egg than indicated on box
24 (or as many cupcakes as you're making) Oreos, bottom half and cream
For the Frosting:
2 sticks unsalted butter, softened
3 cups confectioners sugar
4 tablespoons light cream (I had that on hand - using milk is fine)
2 teaspoons vanilla
Pinch of salt
The chocolate tops of Oreos from the cupcake bottoms, crumbled finely (I threw in 2 extra whole Oreos as well)

Directions: Preheat oven to 350. Line cupcake pans with wrappers. Slice the top chocolate portion of Oreos off and put the other chocolate half down in the wrapper with the cream filling facing up (see photo above.) Mix cake mix, melted butter, milk and eggs. Blend for two minutes at medium speed until fluffy. Scoop batter into the cupcake pan, filling each tin 2/3 full. Bake according to package directions. Allow to cool.

To make the frosting: Crush remaining Oreos finely. Combine butter, confectioners sugar, cream, vanilla and salt together. Blend on medium high for 3-4 minutes, scraping down the bowl once. Add Oreo crumbs and blend until combined. Frost cupcakes as desired. (With frosting, be flexible. If it is not the consistency you would, you can always add more liquid or confectioners sugar to make it thinner or thicker respectively.)

Enjoy!

Thursday, February 23, 2012

Stripes, Dots & Chevron...Oh My!

My friend Kelly is one of the most receptive friends I have to receiving photos of my cookies and writing back notes of encouragement. We developed a "Top Five" system and put the cookies we like the most into that category. These cookies were most definitely "Top Five" for me. They were for a baby shower whose invitations donned stripes, dots and chevron focusing on the colors pink and green. Could that be any more up my alley?! Going along with my thought that sometimes the simplest cookies are the prettiest, I loved the look of these.


Thank you as always Anna! I hope you ladies had a wonderful time at the shower.

Tuesday, February 21, 2012

Here Comes the BRIDE - Bridal Shower

Over the weekend I had the pleasure of attending a beautiful bridal shower in honor of a very deserving bride. Sadly I forgot to bring my camera and had to rely on my phone for photos. So the photography may be lackluster, but the event will certainly shine through.


Of course I walked into the party wearing the EXACT Lilly pattern the guest of honor chose to wear. Ever gracious, she was thrilled by that!

The hostesses put together an elegant white dessert table. I could write an entire post (maybe I will) about the delicious desserts they created. From cake to cookies to candy and more, everything was delicious. I literally had to force myself to walk away from that table.


No detail was spared. They had champagne poured over blueberries, a "blessing tree" for us to share a sentiment with the bride and groom and perfect handmade white decorations. It was such a thoughtful, sophisticated theme and I was impressed as always by my friends' creativity.


The game we played was equally creative. Instead of the typical "questions" game, they took it to the next level by interviewing both the bride and groom. Statements from both were written on a gameboard and we were able to circle the silhouette of who we thought said what.


And of course I was happy to provide the cookie favors. The hostesses only requests were "white" and "glitter" so I went with just that and also incorporated the bride's future monogram.


It was such a fun time with sorority sisters and friends who I do not get to spend enough time with. Thank you Corri, Tiffany and "Sister Linda" for a wonderful afternoon.

And Kara - you know I could not be happier for you!

Friday, February 17, 2012

King Cake Cupcakes


Admittedly, I do not have much experience with King Cake. I made one for a Super Bowl party a few years ago when the Saints were playing but that is as far as King Cake and I go back.


However when I offered to bring dessert to a Mardi Gras themed dinner with my girlfriends, of course there was nothing more appropriate than King Cake. While they traditionally use yeast and have more of a coffee cake texture, I decided to go the cupcake direction while trying to mimmick the overall flavor complete with the filling (my favorite part!) These were a hit last night so I wanted to share the recipe in case you are feeling festive and want to join in the celebration!

King Cake Cupcakes

Ingredients:
For the cupcake:
1 box yellow cake mix
1/2 cup melted butter
Replace amount of water indicated on box with milk
Add 1 additional egg to the amount of eggs the box calls for
1 teaspoon cinnamon
For the filling:
8 oz. Nuefchatel cheese, softened (may use cream cheese if preferred)
1/4 cup sugar
1 teaspoon vanilla extract
Zest of one lemon*
For the glaze:
2 cups confectioners sugar
A few tablespoons milk
1/2 to 1 teaspoon vanilla
Juice of one lemon*

*May omit lemon and replace with cinnamon in the filling if preferred.

Directions:

Preheat oven to temperature indicated on cake mix box. Combine cake mix with melted butter, milk, eggs and cinnamon. Spoon batter into lined muffin tins, about 3/4 full. Bake as indicated on box. Allow to cool.

Once cooled, take a knife and cut a small cone shape out of the center of each cupcake. Blend the neufchatel, sugar, vanilla and lemon zest on medium until fluffy. Fill a pastry or Ziploc bag with the mixture. Snip the end of the bag off and fill the cupcakes.


To make the glaze, combine confectioners sugar with vanilla and lemon juice. Drizzle in milk until you achieve desired consistency. (I did not want mine too thin and would compare its consistency to that of maple syrup.) Spoon the mixture over each cupcake. Decorate as desired.


Laissez les bons temps rouler!

Thursday, February 16, 2012

Oh BOY!

Lately I have been making a LOT of baby shower cookies, particularly for little boys. A baby girl seems to be a rarity in our circle of friends which can only be affirmed as I look back through cookie photos that I haven't written about yet.

I make an effort not to repeat cookies and am overwhelmed with ideas running through my head, but many times people like what they have already seen. Onesies are my number one request so I try to sneak in a tweak here and there. In this first batch, baby boy's dad loves to play rugby prompting the request of a few rugby balls. I added those, ducks, John Johns and bibs to my traditional bottles and onesies for a unique touch.


For this baby boy's "Sip and See" I added in some monogram cookies to make the batch feel more customized.


And finally for the baptism of one of the sweetest little boys I know, his mom and I decided on personalized favors for guests to leave with.


Thank you Gray, Mary & Katy!