Showing posts with label Crafts. Show all posts

Monday, September 17, 2012

Message in a Bottle Rehearsal Dinner

For the past few years, I have spent a week in September in Bald Head Island, NC with my family. One of my mom and my greatest pleasures during our time there is hunting for sea shells. Year after year we comment on the abundant supply to choose from and continue to bring buckets full of our beautiful treasures home. The question my dad continually asked us was what exactly we were going to DO with those shells. .


And although we never really had the perfect answer, thankfully my brother eventually provided one for us.

Last summer he proposed to my now sister-in-law by burying a message in a bottle in the sand during their beach vacation. It was such a romantic gesture that my mom and I decided to run with that theme for their rehearsal dinner this past weekend. We knew we had the shells...we just had to determine exactly how to use them.

(The happy couple with the parents of the bride and groom during the celebration.)


Thankfully I had two fabulous helpers on hand Friday, my cousins, who were my decorating assistants.


Our guests were greeted with a sign explaining the proposal and informing them that they could find their table number in their individual glass bottles. We filled each one with sand, a shell from BHI and stamped the corks with the numbers.


Continuing the theme, table numbers were displayed on bottles. Since you rarely find flowers growing on the beach, we decided to grow wheat grass to flank our lanterns on the tables. Each container had a burlap rosette with a shell and I made individual rosettes to top each napkin.


The shell topiaries were my mom's first attempt at "crafting" in a while. She was a natural. :) I will do a mini tutorial on these another time as I was very happy with how they turned out.


One of my favorite parts was the beachy cake we ordered from Simply Cakes by Allison. Ali made a delicious coconut cake (the bride and groom's favorite) and managed to fool everyone with her elegant candy shells. The cake was a big hit and enjoyed by my family for the rest of the weekend.

And of course it should come as no surprise that I made cookie favors for everyone. Sand dollars and sea shells seemed like the perfect compliment to the evening.


Finally a special shout-out to Mr. Preppy Cookie, who took a great deal of time creating a wonderful slideshow documenting the bride and groom's memories to share with us all.


It was a memorable celebration and the best was yet to come. I am coming down off of such a high spending the weekend with family and friends...wish we could do it all again this week! :)

CONGRATULATIONS Mr. and Mrs. C!

Tuesday, February 7, 2012

TUTORIAL: How to Make Personalized Mini Bunting

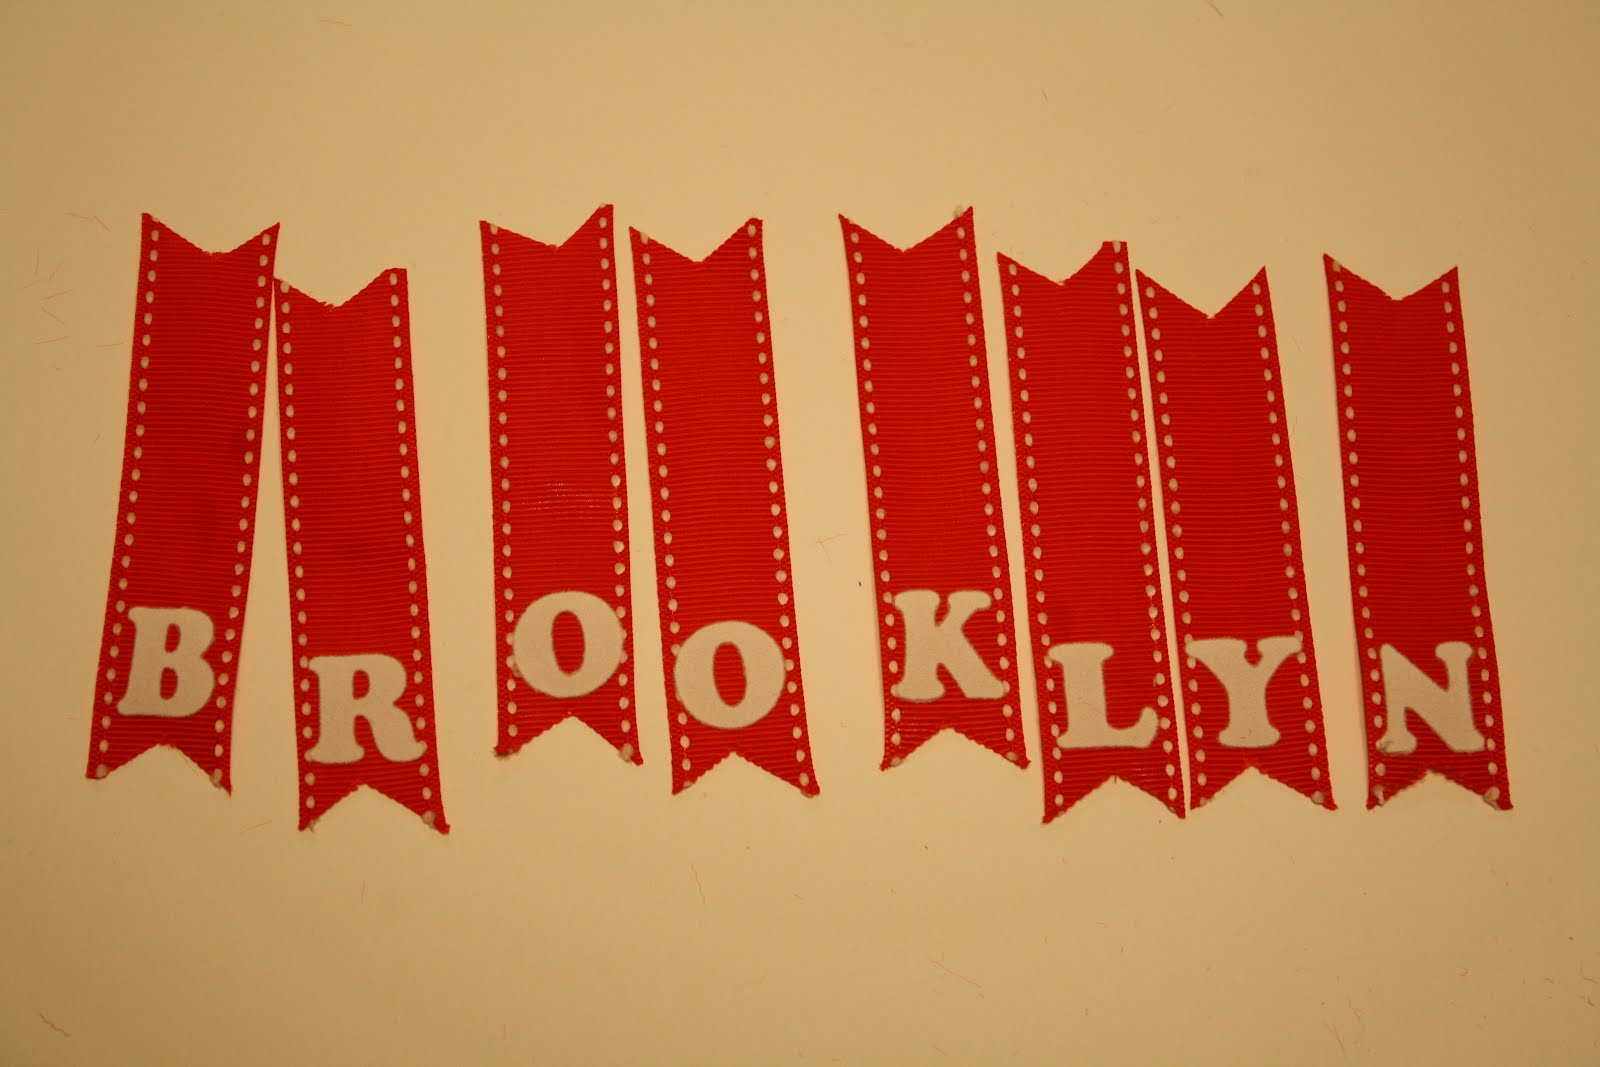
As promised, here is a quick tutorial on making miniature personalized bunting that can be used on cakes, desserts, or even in a plant. It is a fun way to personalize treats/gifts.


To make personalized bunting you will need:
-Ribbon
-Embroidery floss
-Iron on letters (make sure they are smaller than the width of your ribbon)
-Iron
-Glue (I ended up using hot glue and not the spray adhesive from the photo below)
-Skewers
-Scissors


First cut your ribbon into 3-4 inch strips. Fold them in half and trim the ends into your shape of choice.


Following the directions on the package, iron your letters onto the ribbon.


Cut a piece of embroidery floss long enough to accommodate all of your letters with about 3 inches extra on each end. Tie the first end around the skewer.


Attach each ribbon around the floss using the glue to secure the top/ends of the ribbon. Repeat with each letter.


Finally tie the other end of the ribbon to your second skewer.


If you don't want to personalize it, any scrapbook paper or fabric would do the trick.

Okay, time to frost a few cupcakes for a friend's birthday and then it's off to work. Have a great day!

Monday, February 6, 2012

Baby Sprinkle & Doughnut Muffins

I just got home from a weekend away with some of my favorite sorority sisters. It's amazing to think that we all pledged together exactly thirteen years ago and have remained friends ever since. There was much to celebrate aside from a reunion this weekend. The main reason for our trip was to celebrate the upcoming nuptials of a very deserving friend. We have been on some wild (for us) Bachelorette parties in the past complete with trips to Vegas and the Bahamas, but this time around we found ourselves happiest in our pajamas chatting and sipping on a glass of wine. Perfection really!

One morning we surprised another friend with a little baby "sprinkle" to celebrate her second daughter's arrival later this spring. For my contributions, I stuck to a doughnut theme...heavy on the sprinkles.


I will do a tutorial on the personalized mini bunting soon and in the meantime would love to share the muffin recipe with you. Enjoy!

Doughnut Muffins

Ingredients:
Batter
1/4 cup butter
1/4 cup vegetable oil
1/2 cup granulated sugar
1/3 cup brown sugar
2 large eggs
1 1/2 teaspoons baking powder
1/4 teaspoon baking soda
1 to 1 1/4 teaspoons ground nutmeg, to taste
3/4 teaspoon salt
1 teaspoon vanilla extract
2 2/3 cups all-purpose flour
1 cup milk
Topping
3 tablespoons melted butter
3 tablespoons Cinnamon-Sugar Plus or cinnamon sugar

Directions:

1) Preheat the oven to 425°F. Lightly grease a standard muffin tin. Or line with 12 paper or silicone muffin cups, and grease the cups with non-stick vegetable oil spray; this will ensure that they peel off the muffins nicely.
2) In a medium-sized mixing bowl, cream together the butter, vegetable oil, and sugars till smooth.
3) Add the eggs, beating to combine.
4) Stir in the baking powder, baking soda, nutmeg, salt, and vanilla.
5) Stir the flour into the butter mixture alternately with the milk, beginning and ending with the flour and making sure everything is thoroughly combined.
6) Spoon the batter evenly into the prepared pan, filling the cups nearly full.
7) Bake the muffins for 15 to 17 minutes, or until they're a pale golden brown and a cake tester inserted into the middle of one of the center muffins comes out clean.
8) Remove them from the oven, and let them cool for a couple of minutes, or until you can handle them. While they're cooling, melt the butter for the topping (this is easily done in the microwave).
9) Use a pastry brush to paint the top of each muffin with the butter, then sprinkle with the cinnamon-sugar. Or simply dip the tops of muffins into the melted butter, then roll in the cinnamon-sugar.
10) Serve warm, or cool on a rack and wrap airtight. Store for a day or so at room temperature.

Source: King Arthur Flour

And of course I had to bring along a few "doughnut" cookies for us as well.


Nothing like a doughnut muffin and cookie with your coffee to start your day right!

Congratulations E - I cannot wait to meet your newest addition.

Monday, January 30, 2012

TUTORIAL: How to Make a No Sew Applique Shirt

My friends certainly were inspired this weekend! I received texts proudly showing off a custom iPhone case, DIY cork and chalk boards from old frames and adorable no sew applique shirts. (So impressed ladies!) Luckily all three are OPC readers and happily accepted when I asked if they would be interested in putting together a tutorial of sorts to show us how they accomplished these gems.

First up is my good friend Krissy of "In My Life." Even with twin toddler boys and a full schedule to manage, Krissy always is texting me photos of creations she has made and/or baked. We have gone back and forth with recipes and projects for years - it would be dangerous if we lived in the same city!

I will let her do the talking and show us how to make these CUTE shirts. Thank you so much Krissy for taking the time to write this us!


This is nothing new and certainly you can find fancier versions on many other websites and blogs. But the fact that I was able to make it at all (and cheap too!) is what excites me AND that my boys will be sporting their shirts made by yours truly is even better.

I've had in my head that I'd find some cute birthday shirts for the boys to wear on their upcoming special day, so I started searching Etsy and talking to a friend who makes her own personalized items. Then a couple weeks ago I attended a baby shower and the creative hosts had a 'bib and onesie decorating station.' Super clever, user friendly, personal, and cute! And it hit me...once I'd made an outfit for the guest of honor: bun in the oven, I realized this is what I'd been looking for. Thanks to Erin (who happens to do some fabulous design work, which can be seen here) I went home with some spare prepped fabric scraps and her specific instructions (below). That night I dug out some plain shirts in the boys' drawers and got to work. Ten minutes later mission accomplished: superstar two year old birthday shirts!!! Thank you, Amy, for the decorative stitching (optional).

Supplies:
Fabric - Hancock Fabric sells "Design by the Piece" singles for $1.99 each. They're cotton and measure 18" by 21".
Iron-on Adhesive - I bought "Heat and Bond" for $2.99/yard. After reading some more though, I've heard "Stitch Witchery" and "Wonder Under" may be even better for someone planning to go around the applique with a sewing machine.
Template/Stencil
Bib/Onesie/T-shirt
Scissors
Iron
Cardboard

Directions:
-Wash and dry all the fabric and bib/onesie/t-shirt so nothing shrinks up after applying the appliques.
-Cut the Heat and Bond just smaller than the fabric sheets and iron the "glue" side down onto the wrong side of the fabric, leaving the paper up
-Trace shape on the backside of the fabric...a pen will move more smoothly over the Heat and Bond. Remember that if you're doing a letter to trace it backwards because when you flip it over to iron on you'll want it facing the right direction!
-Cut out shape.
-Remove the paper backing and place shape 'tacky' side down onto fabric.
-Place cardboard piece inside the onesie/t-shirt or underneath the bib.
-Iron (cotton setting) shape onto bib/onesie/t-shirt.

The possibilities are endless...children's gifts here I come!

Monday, January 16, 2012

TUTORIAL: How to Make a Paper Heart Wreath

Confession: We just took our Christmas tree down over the weekend. And it was a live one that had been up since the day after Thanksgiving. Needless to say it was looking a little "Charlie Brown" but we just hadn't made the time to do it. That being said, I also put up a few Valentine's Day decorations over the weekend. (Nothing like a quick transition!) I don't do too much decorating for that holiday, although it is a favorite of mine. Most of what I do are little decorations I have made so I thought I would share a few of them with you, starting with a VERY easy paper heart wreath. This is a craft that can easily be done with or by children, is inexpensive and hardly what I would consider time consuming. Need something to do with the kids while your husband is glued to the TV watching NFL playoffs?? This might be it. :)

To make a paper heart wreath you will need:
-Colored paper of your choice (I used 2 designs)
-Scissors
-Glue (I used hot glue)
-Ribbon


First cut about 12 one inch wide strips of paper. You could use a paper cutter if you have one, a ruler, or do what I did and eye-ball it. (Remember this is a paper wreath we're talking about...perfection is not required.) Then fold all of the strips in half with the side of paper you want showing facing out.


Attach a dab of glue to one outside end of the paper.


Then fold the paper into a heart shape with the 2 outside ends meeting in the center. Hold the ends together for a minute so the glue will stick.


Repeat this process with all of your paper strips.


Next glue the hearts together by adding a dab of glue to the side of each heart (just under the heart's outside curve.) Again hold the hearts together for a moment to allow the glue to set. Continue this process until a circle has formed with your hearts.


Tie a ribbon to your wreath wherever you would like it to hang from. (I used 2 ribbons and then tied them in a know at the top.)


Voila!


See? Easy!

Have a great week everyone!

Friday, December 30, 2011

Best of 2011 According to YOU!

It may sound trite but it is very hard for me to believe that 2011 is coming to an end. It has been a year of ups and downs. We have celebrated happy news and endured hard news as well. There is a lot to be thankful for and much to look forward to!

I have had a wonderful time sharing this blog with you all throughout the year and am always amazed to see how many people actually read it. Comments are somewhat of a rarity for me but I know I've had plenty of visitors. (I would love to hear who you are - please leave me a note some time and let me know you visited!)

My intention was always for this blog to be more than just cookies and based on my top 10 most popular posts from 2011, it looks like you all agree. So let's take a trip down memory lane and see what you all enjoyed the most!

1.) Hands down my most popular post was the peppermint wreath. I've seen two of them so far that have been made from the post but would love to see some more. Please feel free to post them on my Facebook page!

2.)The Mason Jar Snow Globes were also very popular. I had a teacher send me a photo of her whole class making them. They can really be adapted to anything you like and are easy to do!


3.) Apparently I am not the only one who loves Ribbon Topiaries. I'm thinking I need to make one for Valentine's Day soon!


4.) Cake Pops continue to be the rage and it appears my readers agree.


5.) The Grosgrain Ribbon Notebook I made for a friend proved popular.


6.) As did the Easy Oreo Truffles and Truffle TREE!


7.) Who doesn't love a story of a miracle complete with a party hat and cookies?


8.) The storybook character cookies were quite popular (round two of those coming soon!)


9.) It seems as though we all enjoy a good summer BBQ...complete with "hamburger cupcakes" and "watermelon cookies." (My friend made the cupcakes all the way in Italy - loved that!)


10.) Finally, to my surprise, the photos from our "preppy wedding" were the tenth most popular post of 2011. That works for me, since almost five years later I still love to look at the photos too. :)


I am so appreciative of you all reading and enjoying One Preppy Cookie throughout the year. This has been a wonderful creative outlet for me and I've enjoyed connecting with so many of you. Thank you!

Thursday, December 8, 2011

TUTORIAL: How to Make a No Sew Party Hat

As you know, we had a very special birthday to celebrate in our circle of friends recently. In the weeks leading up to the party my friend called me to say that the best birthday gift I could give her daughter would be to make her a birthday hat. Not only did my friend have visions of Claire wearing it on her big day, but more importantly she wanted to put the hat in her "bookcase of fame" as a memento of the birthday girl's achievement.

I gladly accepted and got to work. I remembered to take a few (cell phone) photos along the way and wanted to share this DIY project with you!

To Make a No Sew Party Hat you will need:

-Party hat
-Fabric (1/2 yard. I bought two 1/2 half yards since I covered both sides.)
-Spray glue
-Yarn (and optional pom-pom maker)
-Iron on applique
-Trim for bottom of hat
-Ribbon for chin tie
-Hot glue gun


(Note: I ditched the fabric glue in the photo above for spray glue, did not use the puff paint and added in my trusty hot glue gun.)

First I removed the trim from the party hat I had purchased.


Then I flattened out the hat under a stack of books for an hour or so.


Next up I made the pom-pom for the top of the hat. There are many tutorials online regarding how to do this by hand but I prefer my handy tool.


Next trace the flattened hat onto one piece of fabric. Spray the glue onto the back of the fabric and attach it to the inside of the party hat. Repeat the same process for the outside of the hat. Make sure you glue the fabric you want showing to the inside of the original hat so that the design does not peek through. Once both sides are covered, put the hat back together into a cone shape. (I had cut slits in the fabric where the paper hat attached. That made it easier to fit back together once it was covered in fabric.) I used a dab of hot glue where the hat inserted back together.

This is also where I ironed on the cupcake applique. I then cut a small number 1 out of scrap fabric and used the spray glue to attach it to the iron-on.


Hot glue your pom to the top of the hat. Finally hot glue your trim to the bottom of the hat and hot glue your ribbons onto the inside of the hat to serve as chin straps.


In the end I was very happy with the results. If I had to do it again for a one year old, I was definitely use a smaller hat, however I know that this tall version will look nice in "the bookcase." :)


This hat can be adapted to any color scheme...the possibilities are endless!

Tuesday, December 6, 2011

Cookie Exchange Recipe & Display Part Two

The evening prior to Cookie Exchange Party 2010 was a disaster. The cookies I had planned to make were a failure. I tried two different recipes and ended up throwing them both out. Unfortunately I did not discover that the second recipe was a flop until about 2 hours before I had to leave for the party. With time running out and a grocery store run imminent, I realized that homemade was simply no longer an option. I remembered seeing my beloved Pioneer Woman blog about a simple cookie she had made and was on board. Sometimes you just do what you have to do. And you know what? They were good.

Quick Candy Cookies

Ingredients:
Refrigerator Cookie Dough (I used sugar & gingerbread)
Miniature Chocolate Candies (I used Hershey Kisses)

Directions:
Slice the cookie dough into 1 to 1 ½ inch slices. Lay the slices on their side and cut them into quarters. Place each quarter into a greased mini-muffin tin. Peel the wrapper from as many pieces of candy as cookies you’re going to make. (Don’t be afraid to try different combinations of candies and dough.)

Bake the cookie dough in a 350-degree oven for just a few minutes, about 6 to 8 at the most. You’ll want to take them out just when they start to turn golden.

Almost as soon as you pull the warm cookies from the oven, begin lightly pressing one piece of candy into each cookie. The warmer the cookies, the better. They’ll grab onto the pieces of candy and work their magic, making the candy nice and soft and melty.

When they’re all done, carefully remove from muffin tins with a spoon.

Source: The Pioneer Woman

Thankfully I was prepared in the presentation department last year. I had purchased a plastic white cupcake tower at a craft store with a 40% off coupon. I then Mod Podged cocktail napkins (which I had cut into small pieces) directly onto the tower. Finally I trimmed each layer with ribbon and made a little ribbon topper as well.


In the end no one would have known about my baking disaster if I had not told them (which of course I did.) Lesson learned.

Monday, December 5, 2011

Cookie Exchange Recipe & Presentation Part One

I have the luxury of attending two girls' weekends in a row involving cookies this week. This past weekend I got together with some longtime friends from college. We set aside some time for a cookie decorating workshop of sorts and I would say that they did very well for their first try! There were many laughs (and a few pomegranate martinis) shared over this tray of cookies. I loved it.


This coming weekend I will be attending a cookie exchange with some other girlfriends. I thought that this week I could share both of the simple recipes I have brought to this party in years past along with the details of how I displayed them. (I tend to get really into the "presentation competition!")

Year one I brought the easiest Oreo truffles you could ever imagine. I was first introduced to these by my friend Courtney, who brought them to a party I attended years ago. I had never seen people rave so much over one cookie and was intrigued. I have since brought these to an annual Christmas party the past few seasons and am always approached by strangers for the recipe. Easy and a winner? I love it.

Easy Oreo Truffles

Ingredients:
8 ounce package cream cheese, softened
1 package Oreos, finely crushed
2 packages semi-sweet chocolate, melted

Directions:
Mix cream cheese and 3 cups Oreo cookie crumbs until combined.Shape into 1 inch balls (I use a baking scoop to keep the truffles a consistent size.) Dip in melted chocolate; place on waxed paper-covered baking sheet. (I balance the ball inbetween 2 forks to dip it into the chocolate.) Sprinkle with remaining cookie crumbs. Chill 1 hour or until firm. Store in tightly covered container in refrigerator. Yields 4 dozen truffles.

Source: Kraft foods

I firmly believe that presentation is key. For my presentation, I decided to make a "truffle tree." I took a foam cone, cut various patterns of ribbon and then hot glued the ribbons onto the cone. For the base I picked a few magnolia leaves off of our tree and glued them onto a foam circle which I attached the cone to. I added a ribbon at the top and then pinned the truffles to the "tree" using decorative toothpicks.


Enjoy!

Wednesday, November 30, 2011

A Meaningful Celebration

We have these friends. They are the kind of good people that you are proud to call your close friends. They have been friends of my husband's since freshman year at Penn State and quickly became MY friends too over seven years ago. We just love them. You can imagine how excited we were for them when we received a call in the summer of 2010 saying that they were expecting twin girls the following spring. Good things happen to good people!

Well, the babies came a little too early last November…16 weeks too early to be exact. Claire and Mary entered the world at their own will...tough cookies just like their mom! Mary fought the good fight for two strenuous weeks before leaving us all to go to a better place and serve as an angel watching over her sister. After an uphill battle and 103 days in a wonderful NICU Claire, at one point weighing only 15 ounces, celebrated her first birthday two weeks ago. She has amazed us all with her inspirational spirit from day one. As I am sure you have gathered, Claire is a miracle in many ways…a miracle who can melt your heart with one quick smile. She has brought joy to so many, undoubtedly none more so than to her parents who have served as role-models over the past year in the department of rising to the occasion.


“One day at a time” was and continues to be their mantra, even partnering with the March of Dimes to have bracelets printed with the sentiment to be given to other parents braving the uncertainty of a premature child. November is Prematurity Awareness Month® and when the March of Dimes focuses the nation’s attention on premature birth. You can learn more about their efforts here.

Or you can just rejoice in the fact that Claire happily celebrated her first birthday party with her biggest cheerleaders last weekend…complete with preppy birthday cookies. :)


And the only gift her mom said she wanted from me...a party hat.


Of course I was more than happy to oblige. (Tutorial coming soon!)


Thank you for allowing me to tell your story and share your photos Mart. You are such a hero in my eyes...even if you don't own a hot glue gun. ;)