Showing posts with label Christmas. Show all posts

Thursday, December 29, 2011

Christmas Eve Chocolate Gingerbread Toffee Cake

For the past few years I have made a special cake on Christmas Eve. I pick a bit more complicated recipe than I typically would as I enjoy dedicating much of the day to this labor of love. Last year was Martha's Candy Bar Cake and this year I went with a Southern Living selection. Both cakes have been very well recived amongst my family and I am already on the hunt for next year's creation.


Chocolate Gingerbread Toffee Cake

YIELD: 10 to 12 servings
HANDS-ON:45 Minutes
TOTAL:9 Hours, 5 Minutes

Ingredients:
Ginger Whipped Cream
1 1/2 cups semisweet chocolate morsels
1 (16-oz.) package light brown sugar
1/2 cup butter, softened
3 large eggs
2 cups all-purpose flour
3/4 teaspoon ground ginger
3/4 teaspoon ground cinnamon
1/2 teaspoon salt
1/2 teaspoon ground allspice
1/4 teaspoon freshly ground nutmeg
1 (8-oz.) container sour cream
1 cup hot water
1/2 cup molasses
1 teaspoon baking soda
2 teaspoons vanilla extract
Silky Ganache
1 cup toffee bits

Garnishes:
Gingerbread Cookies (optional)

Preparation
1. Preheat oven to 350°. Prepare Ginger Whipped Cream as directed in Step 1 of recipe (through chilling).

2. Microwave chocolate morsels in a microwave-safe bowl at high 1 to 1 1/2 minutes or until melted and smooth, stirring at 30-second intervals.

3. Beat brown sugar and butter at medium speed with an electric mixer until well blended (about 5 minutes). Add eggs, 1 at a time, beating just until blended after each addition. Add melted chocolate, beating just until blended.

4. Sift together flour and next 5 ingredients. Gradually add to chocolate mixture alternately with sour cream, beginning and ending with flour mixture. Beat at low speed just until blended after each addition. Stir together hot water and next 2 ingredients. (Mixture will foam.) Gradually stir molasses mixture and vanilla into chocolate mixture just until blended. Spoon batter into 3 greased and floured 8-inch round cake pans.

5. Bake at 350° for 25 to 30 minutes or until a wooden pick inserted in center comes out clean. Cool in pans on wire racks 10 minutes; remove from pans to wire racks, and cool completely (about 1 hour).

6. Meanwhile, prepare Silky Ganache. Place 1 cake layer on a cake stand or serving plate. Spread with half of ganache; sprinkle with 1/2 cup toffee bits. Top with second cake layer; spread with remaining ganache, and sprinkle with remaining 1/2 cup toffee bits. Top with remaining cake layer. Cover and chill 2 to 8 hours.

7. Finish preparing Ginger Whipped Cream as directed in Step 2 of recipe. Spread top and sides of cake with whipped cream just before serving. Garnish, if desired.

Southern Living DECEMBER 2011

Enjoy!

Friday, December 23, 2011

Christmas Cookie Decorating

I came across this photo of me the other day from what must have been first or second grade:


Funny thing is that you can find me using this very technique and very similar supplies almost every single night. Little did whomever took this photo know that it was a vision of foreshadowing at its best!

Last night I hosted a few friends of similar age to me in the photo for cookie decorating! I did not make them do the rolling seen above, but every other step of the process was up to them.


We had a good time and saw some creative masterpieces in the works. Santa ended up with some beautiful cookies...I hope he likes a LOT of icing and sprinkles. :)


Need a quick activity so you can wrap, cook, or just take a little breather this weekend? Set out a few toothpicks, marshmallows, candy, fruit roll-ups, etc. and let your kids build their own snowmen...


What a fun evening celebrating the season!

Thursday, December 15, 2011

Christmas Cake Pops

One night after an evening of attempting to make decorated cookies for her son's school birthday party, my friend H sent me a text saying, "I bow to you. That was HARD." I understood what she meant. There are many things in life that take a lot of practice. Whenever I am struggling to master something new I have to remind myself that Tiger Woods himself practices golf every.single.morning. Things just don't come easy in life without a LOT of consistent practice.

You know how I "bow to" though? (I am talking baking-wise here.) People who are cake pop wizards. Recently I saw a tweet saying that there should be a Cake Pop Awareness Day to acknowledge the emotional stress they induce. I laughed out loud and could not have agreed more. So when I came across this website yesterday I wanted to send the blogger a note saying, "I bow to you. That looks HARD." And you know what she would probably write back? That I would get the hang of it after a while. It just takes practice.

These red velvet cake pops were at a friend's ornament party last weekend. I had warned her that although they would not be in an elaborate shape, I would instead spend my time making sure they were delicious. I figure that if Starbucks can stick with round cake pops with a focus on taste, then I will go ahead and follow suit. :)


So here's to practice making perfect...and taste trumping presentation once in a while.

Thank you Decia!

Monday, December 12, 2011

Peppermint Mocha Cookies

This past weekend I attended a third annual cookie exchange party with friends. The party was filled with delicious, creative recipes and I am still working my way through tasting them all.

I am one of those people who loves to see the red cups arrive at Starbucks signaling the holiday season growing near. Gingerbread lattes and peppermint mochas are my seasonal drinks of choice, so I decided to channel one into a cookie. In the end, I chose peppermint mocha cookies and was happy with the results. If you love chocolate combined with mint and a hint of espresso then this is the cookie for you. I highly recommend eating them right out of the oven. :) Enjoy!


Peppermint Mocha Cookies

Ingredients:
-8 oz semisweet chocolate, roughly chopped
-4 Tbsp unsalted butter
-2/3 cup flour
-1/2 tsp baking powder
-2 teaspoons espresso powder
-1/2 tsp salt
-2 large eggs
-3/4 cup packed light-brown sugar
-1 tsp pure vanilla bean paste (substitute vanilla extract as needed)
-1 tsp peppermint extract
-12 oz package semisweet chocolate chips
-Sprinkles and/or chopped peppermints for garnish

Directions:
-Preheat oven to 350 degrees. Cover 2 baking sheets with parchment paper.
-Heat chopped chocolate in microwave in 30 second intervals until melted. Set aside to cool for a few minutes. Do the same with the butter.
-In the bowl of your mixer beat eggs, brown sugar, vanilla, vanilla bean paste and peppermint extract on high speed until the sugar has completely dissolved (4-5 minutes). Reduce speed to low and add the melted chocolate. Mix until uniform. Add the melted butter. Add espresso powder, baking powder and salt. Add in flour and mix until combined. Mix in the chocolate chips.
-Refrigerate dough for 15 minutes. (Dough should easily form round circles when scooped.)
-Using a cookie scoop, drop heaping tablespoons of dough 2 to 3 inches apart onto baking sheets. Bake approximately 10 minutes. Place your garnish onto the top of the cookies while hot so that they will set on top. Allow to cool 15 minutes before transferring.

Yields 2 dozen cookies

Adapted from: Confections of a Foodie Bride via Martha Stewart

Wednesday, December 7, 2011

Christmas Cookies Explained

Season's Greetings!

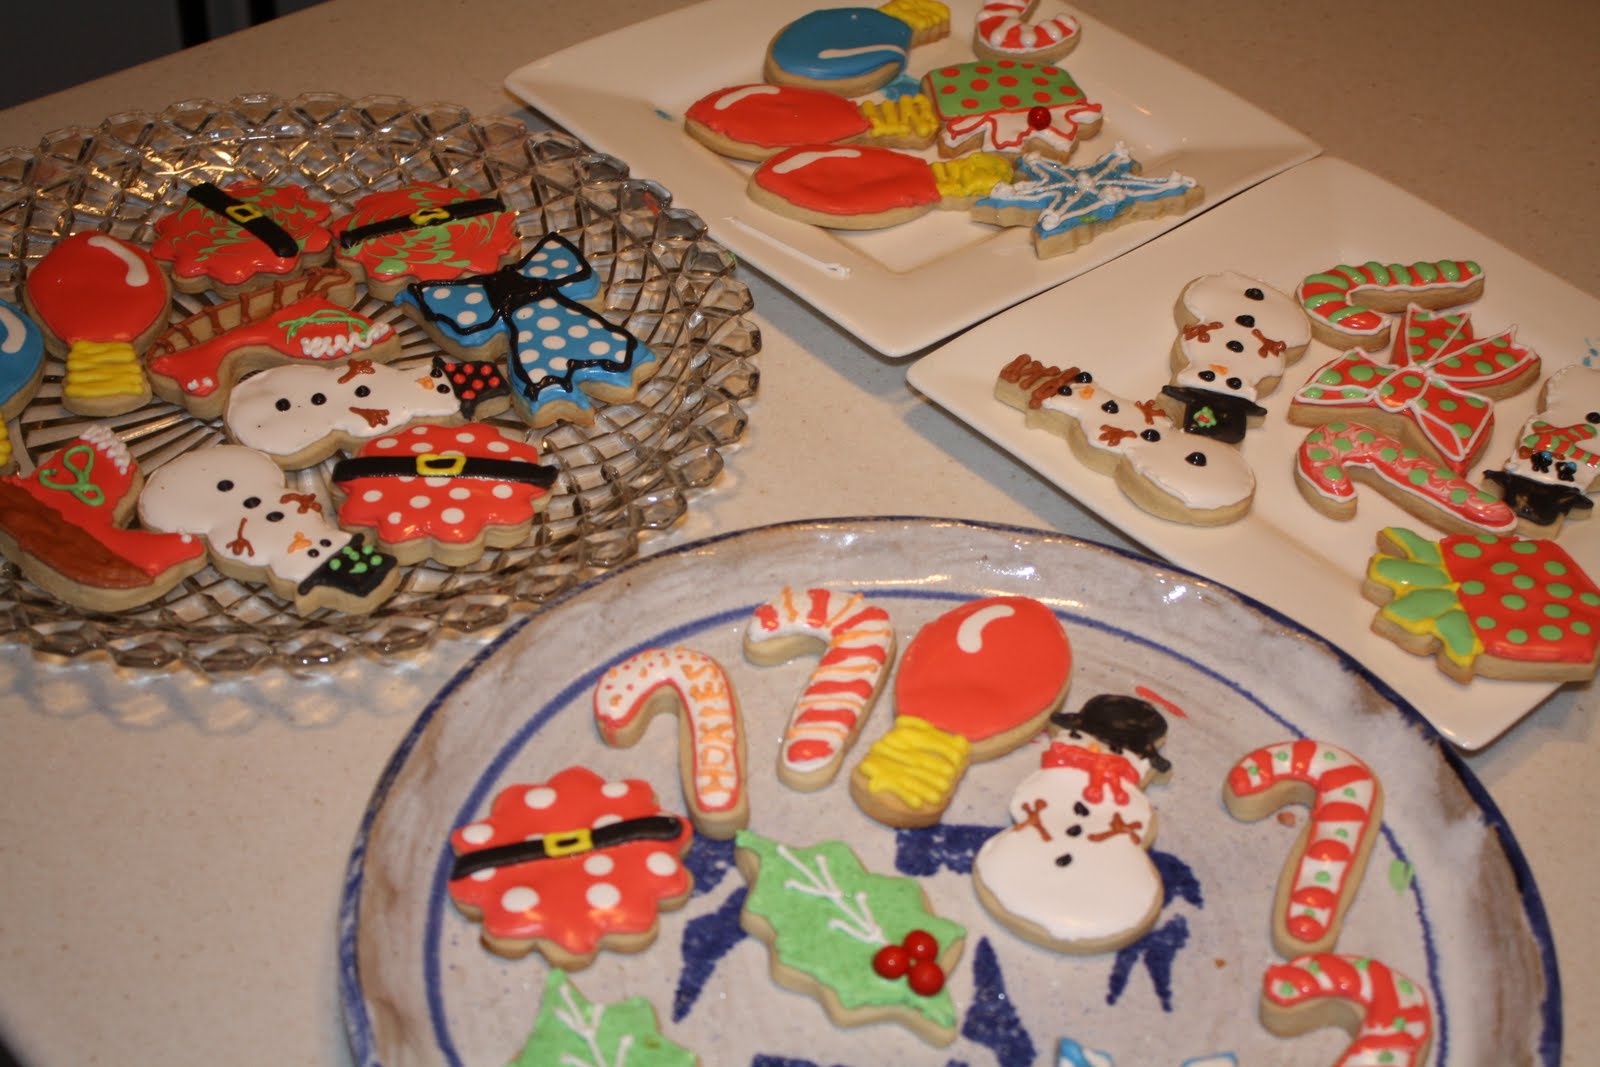
If you're not on Facebook then you may not have seen the Christmas cookies I made last week. I thought I would show them to my loyal blog readers and also explain why I chose the shapes that I did for round one. While each of the shapes is certainly traditional, there is specific meaning to me behind each one.

Ornaments - I'm not a themed tree kind of girl. While I know that will change some day when I have enough space for multiple trees, for now I stick with the "eclectic" tree. We look for an ornament whenever we travel and I really enjoy unpacking our treasures each year and remembering where we've visited.


Christmas trees - We go the live route every year and I always look forward to the day when we put our tree up!


Snowflakes - While I consider myself a warm weather girl at heart, I do love a good snowfall. Making these reminded me of the 2 blizzards we experienced in 2010. While I do not hope to see that repeated this year, it really was kind of fun.


Santa's sleigh - When I bought this cutter, I had one story in mind. My grandfather always told us a story about his uncle "spotting Santa Claus in his sleigh" one Christmas Eve when he was a child. His uncle told him that he saw a new vacuum for my great grandmother peeking out the back of the sleigh and the next morning there it was under the tree. :) I love the memory of him telling that story.


Peppermints and candy canes - This is an alternative until I have the time to experiment with ribbon candy cookies. That is the traditional candy my family buys this time of year. I don't think any of us have ever eaten it, but we love to display it in my great grandmother's candy dish.


Colored bulbs - Oh how I BEGGED my parents to put these on our tree each year. My mom always went with traditional white lights on the tree (as I still do today) but there was a period of time when these colored bulbs were my favorite. To appease me, my dad would decorate one tree in the backyard with these large colored bulbs.


Holly - Every year my grandfather would cut fresh sprigs of holly from his yard and tie them onto his car's antenna. It was a true symbol of Christmas for us.


And finally - presents. I love wrapping gifts and often am called out at showers and parties as the recipient can usually spot my gift in a split second.


Whew! Anyone still reading this?? Thank you for letting me share the meaning behind my choices. There are many seasonal cookies still to come...I promise next time I will break them up into separate posts.

'Tis the season!

Tuesday, December 6, 2011

Cookie Exchange Recipe & Display Part Two

The evening prior to Cookie Exchange Party 2010 was a disaster. The cookies I had planned to make were a failure. I tried two different recipes and ended up throwing them both out. Unfortunately I did not discover that the second recipe was a flop until about 2 hours before I had to leave for the party. With time running out and a grocery store run imminent, I realized that homemade was simply no longer an option. I remembered seeing my beloved Pioneer Woman blog about a simple cookie she had made and was on board. Sometimes you just do what you have to do. And you know what? They were good.

Quick Candy Cookies

Ingredients:
Refrigerator Cookie Dough (I used sugar & gingerbread)
Miniature Chocolate Candies (I used Hershey Kisses)

Directions:
Slice the cookie dough into 1 to 1 ½ inch slices. Lay the slices on their side and cut them into quarters. Place each quarter into a greased mini-muffin tin. Peel the wrapper from as many pieces of candy as cookies you’re going to make. (Don’t be afraid to try different combinations of candies and dough.)

Bake the cookie dough in a 350-degree oven for just a few minutes, about 6 to 8 at the most. You’ll want to take them out just when they start to turn golden.

Almost as soon as you pull the warm cookies from the oven, begin lightly pressing one piece of candy into each cookie. The warmer the cookies, the better. They’ll grab onto the pieces of candy and work their magic, making the candy nice and soft and melty.

When they’re all done, carefully remove from muffin tins with a spoon.

Source: The Pioneer Woman

Thankfully I was prepared in the presentation department last year. I had purchased a plastic white cupcake tower at a craft store with a 40% off coupon. I then Mod Podged cocktail napkins (which I had cut into small pieces) directly onto the tower. Finally I trimmed each layer with ribbon and made a little ribbon topper as well.


In the end no one would have known about my baking disaster if I had not told them (which of course I did.) Lesson learned.

Monday, December 5, 2011

Cookie Exchange Recipe & Presentation Part One

I have the luxury of attending two girls' weekends in a row involving cookies this week. This past weekend I got together with some longtime friends from college. We set aside some time for a cookie decorating workshop of sorts and I would say that they did very well for their first try! There were many laughs (and a few pomegranate martinis) shared over this tray of cookies. I loved it.


This coming weekend I will be attending a cookie exchange with some other girlfriends. I thought that this week I could share both of the simple recipes I have brought to this party in years past along with the details of how I displayed them. (I tend to get really into the "presentation competition!")

Year one I brought the easiest Oreo truffles you could ever imagine. I was first introduced to these by my friend Courtney, who brought them to a party I attended years ago. I had never seen people rave so much over one cookie and was intrigued. I have since brought these to an annual Christmas party the past few seasons and am always approached by strangers for the recipe. Easy and a winner? I love it.

Easy Oreo Truffles

Ingredients:
8 ounce package cream cheese, softened
1 package Oreos, finely crushed
2 packages semi-sweet chocolate, melted

Directions:
Mix cream cheese and 3 cups Oreo cookie crumbs until combined.Shape into 1 inch balls (I use a baking scoop to keep the truffles a consistent size.) Dip in melted chocolate; place on waxed paper-covered baking sheet. (I balance the ball inbetween 2 forks to dip it into the chocolate.) Sprinkle with remaining cookie crumbs. Chill 1 hour or until firm. Store in tightly covered container in refrigerator. Yields 4 dozen truffles.

Source: Kraft foods

I firmly believe that presentation is key. For my presentation, I decided to make a "truffle tree." I took a foam cone, cut various patterns of ribbon and then hot glued the ribbons onto the cone. For the base I picked a few magnolia leaves off of our tree and glued them onto a foam circle which I attached the cone to. I added a ribbon at the top and then pinned the truffles to the "tree" using decorative toothpicks.


Enjoy!

Friday, December 2, 2011

It's Beginning to Look a LOT Like Christmas (Cookies!)

Last night Christmas cookie season was in full swing for One Preppy Cookie!

Each of these designs has a story to tell that I do not have time to think through this morning but I wanted to let you know that I posted Christmas cookie photos on my Facebook page. Please come on over and take a peek!


In the meantime these will be going to one of OPC's biggest fans and my friend for her ornament exchange party this weekend.


Thank you once again MaryJo!

Wishing you all a wonderful weekend.

Tuesday, November 29, 2011

TUTORIAL: How to Make a Peppermint Wreath

Last year a friend of mine was working on the cutest candy corn wreath for Halloween. I loved it but never got around to making one myself. We talked about that very wreath just the other day and it inspired me to think of a Christmas version. Hence I got to work on a very simple project - a peppermint wreath. I intend to wire this into the center of my green wreath for a punch of color and whimsy. (Although I haven't made it that far yet so for now I will just show you the peppermint part for now!)

To make a peppermint wreath you will need:

-Styrofoam wreath form
-Red duct tape
-1 large bag of unwrapped peppermints (I sprayed mine with Krylon Preserve It first)
-Hot glue gun & plenty of glue sticks
-Ribbon

(Please ignore the pipe cleaners in this photo. I ended up not using them.)


This wreath is as easy as 1-2-3.

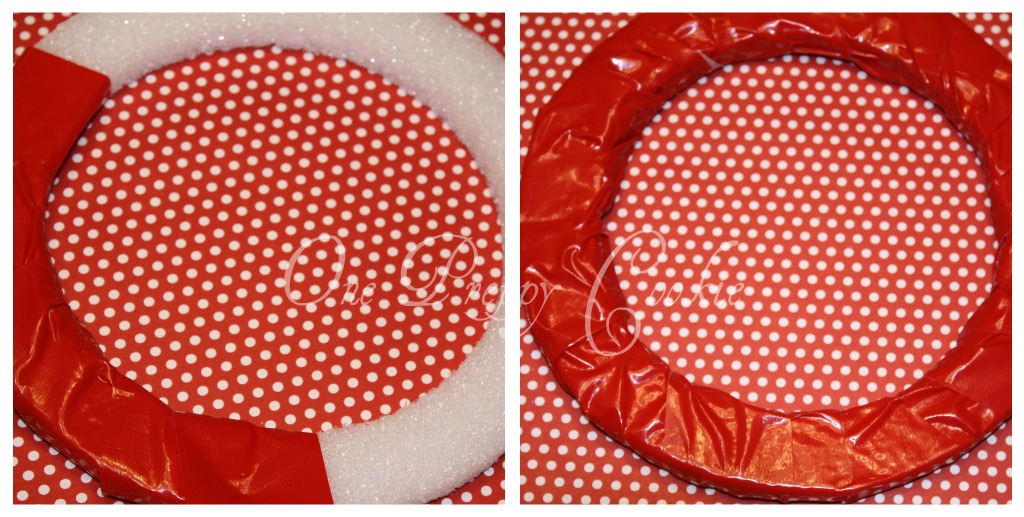
1.) Wrap the styrofoam with duct tape.


2.) Dab a bit of hot glue onto the back of each peppermint and attach it to the wreath. Start in the center, then work on the main part of the wreath and wrap up with the outer layer. (Remember to spray the peppermints with a protective spray if you plan to reuse your wreath. Follow the directions as listed prior to using.)


3.) Attach a ribbon of your choice for the wreath to hang from. (Or wire it into the center of a green wreath as I eventually intend to.)


And there you have it - a simple, festive project done in a snap.

Merry Merry!

Monday, November 28, 2011

Decking the *Sparkly* Halls

As I was scrolling through Pinterest the other day I came across this pin promising three times the "sparkle" on your Christmas tree with just a few simple steps. Intrigued, I decided to give it a try over the weekend while setting up our tree.

I went to my craft store and bought the supplies. (Mirror squares, ornament hangers and my trusty hot glue gun.)


I simply glued an ornament hanger to the back of one square and then attached the back of the other square to the excess hot glue (you will then have mirrors on both sides.)


I placed about one dozen of these ornaments inside of the tree near lights prior to putting on my ornaments. In the end, I am not sure that it made a huge difference (anyone have any pointers to make it more effective??) I do like a LOT of lights on our tree as it is, so we have plenty of sparkle with or without assistance...


Every little bit helps I suppose. 'Tis the season!