Wednesday, February 15, 2012

The Original 90210...in Cookies

Can you imagine being in high school and pulling into the parking space next to Steve's Corvette fitted with this license plate?


And settling in to first period with a Brandon-and-Andrea-approved copy of The Blaze?


Maybe after school we'd head over for a slice of pie at The Peach Pit...


And of course we would rally for our good friend Donna.


To make sure she graduated from here:


Once we ensured that everyone in the gang graduated, we could all go to college together and join Alpha or KEG respectively.


Did you figure out where I am yet?

That's right! I'm here...


("Dananana Dananana Chh Chh" - my attempt at getting the theme song in your head.)

It's funny. I was not allowed to watch Beverly Hills 90210 for the first few years it came out. Yet I can remember their high school newspaper's name and not the one from my own alma mater. I specifically remember my roommates and I gathering around our TV in college in my first off-campus apartment watching the episodes weekly. (If only I could show you the TV we had. It was decades old at THAT time.) We cried at the final episode and wondered how we would fill the void. Little did we know that we would be okay considering the fact that there are reruns on EVERY day.

Enter a friend (ironically from my high school) who asked for cookies honoring her 90210-loving sister's birthday. A little rusty on my Beverly Hills trivia, I contacted that most loyal follower of the show I know who quickly gave me some great ideas to get going with.

There is nothing like a little nostalgia to make everyone happy.


Thank you Kim...and also to the ladies who provided inspiration!

Tuesday, February 14, 2012

Happy Valentine's Day!

I have always loved Valentine's Day. Growing up my mom would make us a fun dinner to celebrate. She decorated and had a little surprise waiting for us at our place at the table. It was always special so I guess my husband has her to blame for it being a favorite holiday of mine. ;) As I got older, it meant waiting to see if you received a rose from a "secret admirer" in high school while college brought going out with my sorority sister to protest or celebrate depending on the year. And it ALWAYS has meant sending Valentines for me. I didn't outgrow doing that once the little mailboxes were no longer on my school desk. Luckily these days I do have a Valentine to be thankful for but even if you don't it is a good day to just celebrate the ones you care about.

So whether you are a fan of it or not, I wish you a very happy Valentine's Day!


xoxo

PS - Wishing my future SIL a very HAPPY Birthday! We are all so happy to have you in our family.

Thursday, February 9, 2012

Chocolate Cookie Dough Cupcakes with Chocolate Buttercream


Today is my 30th birthday...again. ;) Funny how that happens! I turned thirty in the middle of a blizzard and thankfully will be enjoying much nicer weather today. We have no big plans and I am perfectly happy with that. In honor of my special day I thought I would share a delicious recipe with you, my dedicated readers who I truly appreciate.

A friend of mine celebrated her own birthday a few days ago and I wanted to bake something fun for her. She loves chocolate and also cookies, so an idea came to mind. I took the filling from the chocolate chip cookie dough cupcakes I had made previously and added it to my great aunt's "No Fail Chocolate Cupcake" recipe. Topped off with chocolate buttercream and a star was born! This is a decadent cupcake and not for the bashful but with the leftovers soliciting several enthusiastic emails from the coworkers I shared them with, I knew they were "blog worthy."

So happy birthday to me and happy "cupcaking" to you. Enjoy!

Chocolate Cookie Dough Cupcakes with Chocolate Buttercream

For the cupcakes:
-2 eggs
-1 cup Cocoa
-2 sticks butter softened
-3 cups flour
-*1 cup sour milk
-2 tsp. vanilla
-2 tsp. baking soda
-2 cup sugar
-1 cup hot water
* I put vinegar (1-2 tbs.) in milk to sour it

For the filling:
-4 tbsp. unsalted butter, at room temperature
-6 tbsp. light brown sugar, packed
-1 cup plus 2 tbsp. all-purpose flour
-7 oz. sweetened condensed milk
-½ tsp. vanilla extract
-¼ cup mini semisweet chocolate chips

For the frosting:
-8 oz. unsweetened chocolate, chopped
-6 cups confectioners' sugar
-2 sticks unsalted butter
-6 Tbs. milk, plus more, if needed
-2 tsp. vanilla extract
-1/4 tsp. salt

Preheat oven to 350. Add ingredients in order into mixer. Beat for two minutes. Bake in muffin tins with paper wrappers for 20 min. (You do not need to fill the muffin tins more than 3/4 full as this batter rises nicely.) Yields about 24 cupcakes.

To make the cookie dough filling, combine the butter and sugar in a mixing bowl and cream on medium-high speed until light and fluffy, about 2 minutes. Beat in the flour, sweetened condensed milk and vanilla until incorporated and smooth. Stir in the chocolate chips. Cover with plastic wrap and refrigerate until the mixture has firmed up a bit, about an hour.

To fill the cupcakes, cut a cone-shaped portion out of the center of each cupcake. Fill each hole with a chunk of the chilled cookie dough mixture.

For the frosting, put the chocolate in the top pan of a double boiler set over but not touching simmering water in the bottom pan. Stir until the chocolate is melted and smooth. Let cool to room temperature.

In the bowl of an electric mixer fitted with the flat beater, combine the confectioners' sugar, butter, the 6 Tbs. milk, the vanilla and salt and beat on low speed until combined, about 1 minute. Stop the mixer and scrape down the sides of the bowl. Increase the speed to medium and beat for 2 minutes, then reduce the speed to low. Add the chocolate and beat until combined, then increase the speed to medium and beat for 1 minute more.

If the frosting is dry, add more milk, 1 tsp. at a time, until it is creamy but still holds peaks. Makes about 4 1/2 cups.


Sources: Cupcakes - Great Aunt Josie, Filling - Annie's Eats, Frosting - Williams Sonoma

Tuesday, February 7, 2012

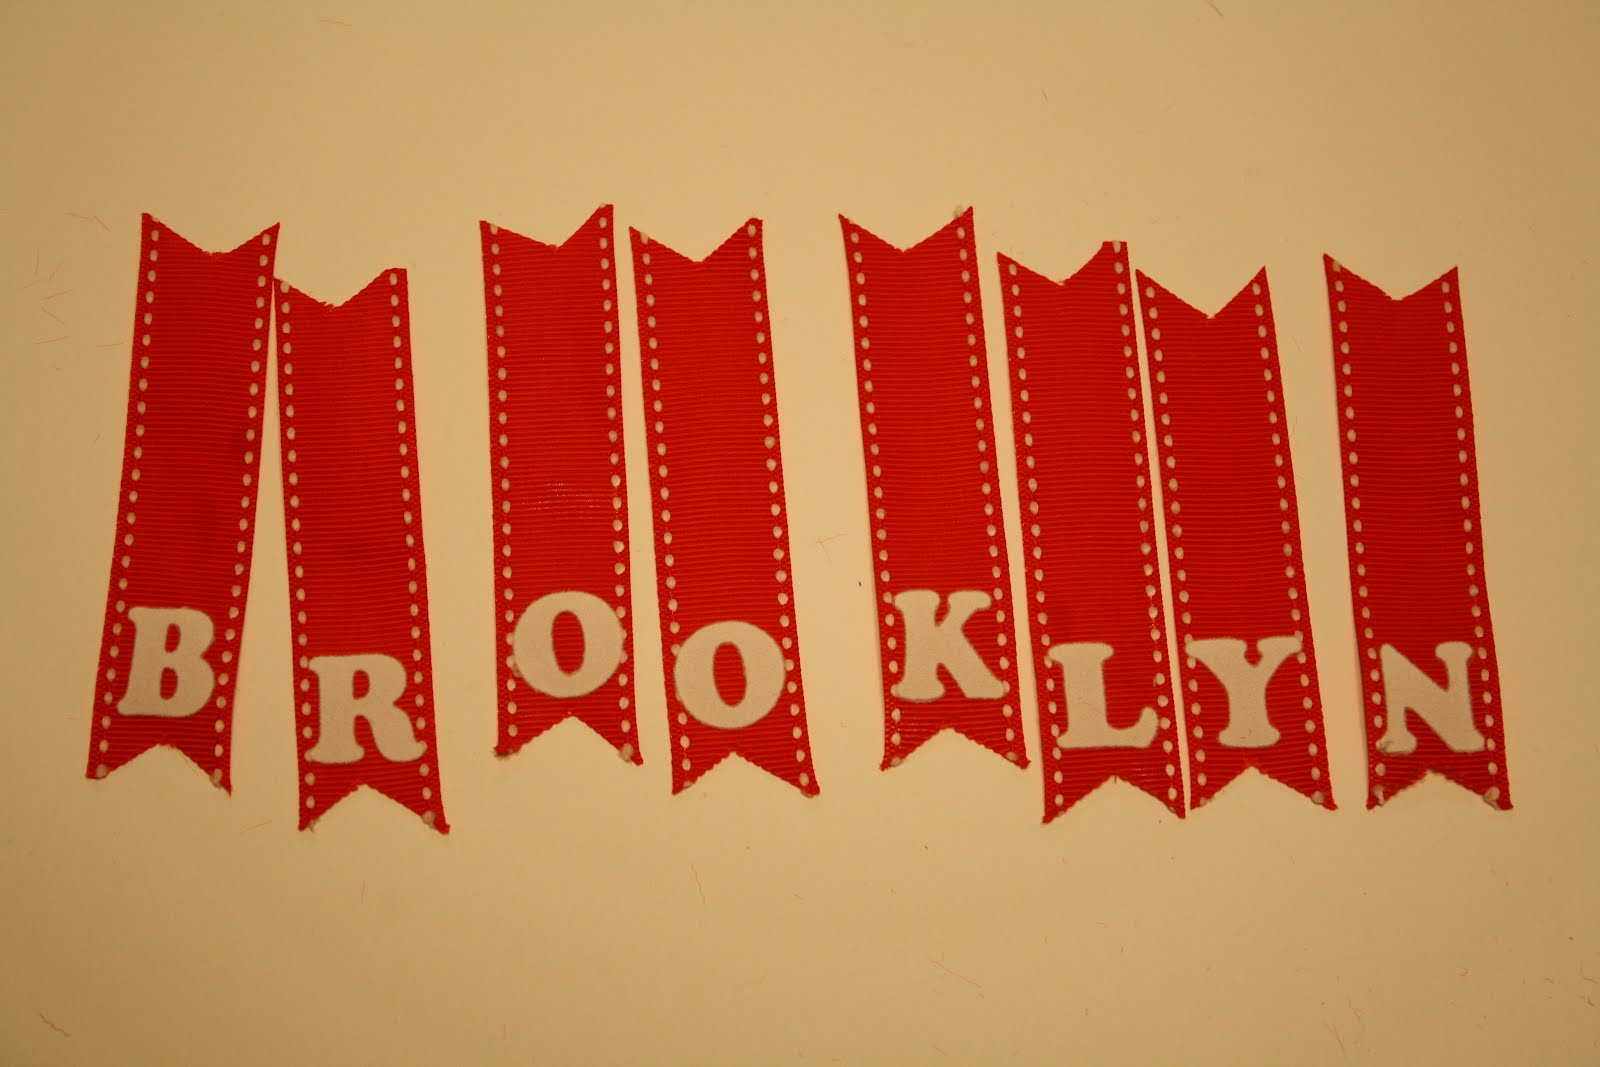
TUTORIAL: How to Make Personalized Mini Bunting

As promised, here is a quick tutorial on making miniature personalized bunting that can be used on cakes, desserts, or even in a plant. It is a fun way to personalize treats/gifts.


To make personalized bunting you will need:
-Ribbon
-Embroidery floss
-Iron on letters (make sure they are smaller than the width of your ribbon)
-Iron
-Glue (I ended up using hot glue and not the spray adhesive from the photo below)
-Skewers
-Scissors


First cut your ribbon into 3-4 inch strips. Fold them in half and trim the ends into your shape of choice.


Following the directions on the package, iron your letters onto the ribbon.


Cut a piece of embroidery floss long enough to accommodate all of your letters with about 3 inches extra on each end. Tie the first end around the skewer.


Attach each ribbon around the floss using the glue to secure the top/ends of the ribbon. Repeat with each letter.


Finally tie the other end of the ribbon to your second skewer.


If you don't want to personalize it, any scrapbook paper or fabric would do the trick.

Okay, time to frost a few cupcakes for a friend's birthday and then it's off to work. Have a great day!

Monday, February 6, 2012

Baby Sprinkle & Doughnut Muffins

I just got home from a weekend away with some of my favorite sorority sisters. It's amazing to think that we all pledged together exactly thirteen years ago and have remained friends ever since. There was much to celebrate aside from a reunion this weekend. The main reason for our trip was to celebrate the upcoming nuptials of a very deserving friend. We have been on some wild (for us) Bachelorette parties in the past complete with trips to Vegas and the Bahamas, but this time around we found ourselves happiest in our pajamas chatting and sipping on a glass of wine. Perfection really!

One morning we surprised another friend with a little baby "sprinkle" to celebrate her second daughter's arrival later this spring. For my contributions, I stuck to a doughnut theme...heavy on the sprinkles.


I will do a tutorial on the personalized mini bunting soon and in the meantime would love to share the muffin recipe with you. Enjoy!

Doughnut Muffins

Ingredients:
Batter
1/4 cup butter
1/4 cup vegetable oil
1/2 cup granulated sugar
1/3 cup brown sugar
2 large eggs
1 1/2 teaspoons baking powder
1/4 teaspoon baking soda
1 to 1 1/4 teaspoons ground nutmeg, to taste
3/4 teaspoon salt
1 teaspoon vanilla extract
2 2/3 cups all-purpose flour
1 cup milk
Topping
3 tablespoons melted butter
3 tablespoons Cinnamon-Sugar Plus or cinnamon sugar

Directions:

1) Preheat the oven to 425°F. Lightly grease a standard muffin tin. Or line with 12 paper or silicone muffin cups, and grease the cups with non-stick vegetable oil spray; this will ensure that they peel off the muffins nicely.
2) In a medium-sized mixing bowl, cream together the butter, vegetable oil, and sugars till smooth.
3) Add the eggs, beating to combine.
4) Stir in the baking powder, baking soda, nutmeg, salt, and vanilla.
5) Stir the flour into the butter mixture alternately with the milk, beginning and ending with the flour and making sure everything is thoroughly combined.
6) Spoon the batter evenly into the prepared pan, filling the cups nearly full.
7) Bake the muffins for 15 to 17 minutes, or until they're a pale golden brown and a cake tester inserted into the middle of one of the center muffins comes out clean.
8) Remove them from the oven, and let them cool for a couple of minutes, or until you can handle them. While they're cooling, melt the butter for the topping (this is easily done in the microwave).
9) Use a pastry brush to paint the top of each muffin with the butter, then sprinkle with the cinnamon-sugar. Or simply dip the tops of muffins into the melted butter, then roll in the cinnamon-sugar.
10) Serve warm, or cool on a rack and wrap airtight. Store for a day or so at room temperature.

Source: King Arthur Flour

And of course I had to bring along a few "doughnut" cookies for us as well.


Nothing like a doughnut muffin and cookie with your coffee to start your day right!

Congratulations E - I cannot wait to meet your newest addition.

Friday, February 3, 2012

Angry Birds

Angry Birds. Sure, I had heard of it a while back. I didn't convert to an iPhone until over the summer though and did not download the game itself until I was on a long car trip back in November. Turns out I was not a pro at the game whatsoever. Later that very weekend I downloaded the game my friend's daughter saw it on my phone. She proudly proclaimed, "Oh! My brother (who is five) loves Angry Birds - he beat the whole game!" That cracked me up. Of course a five year old could beat a game I couldn't really even grasp the premise of. ;)

I know Angry Birds is quite popular right now. (If only I had thought of it!) A friend of mine made her son an amazing Angry Birds birthday cake over the summer and I knew it was only a matter of time until I made them in cookie form. Enter a friend who asked me to make them for her seven year old son's birthday party. I went with the three "birds" on his invitation and had a lot of fun making these, with my favorite part being the addition of the sky/clouds.


Thankfully it did not inspire me to try another hand at the game...I'll stick with Words with Friends.

Thank you Janelle!

Thursday, February 2, 2012

PUPcakes

We celebrated a birthday in the Preppy Cookie family yesterday - our goldendoodle Millie turned three! She is a very loved girl so of course her birthday could not go unmentioned. Millie wore her annual grosgrain ribbon party hat and happily posed for her birthday photo.


My friend sent me a recipe for "pupcakes" a few months ago and I finally decided to give them a try with this celebration upon us. The ingredients are friendly for both human and pups, although somehow I think they appeal to the latter of the two. With a mini biscuit as a garnish, we were all set for a tasting!


And based on the birthday girl's reaction...


They received two paws up! (Haha I could not resist saying that.)


This was my first experience in canine baking although I know it was not my last as I have been dying to try my hand at "royal icing" dog biscuits. Stay tuned!

PS - After a quick google search, it looks like there are some fun canine baking recipes here. Oh the possibilities!